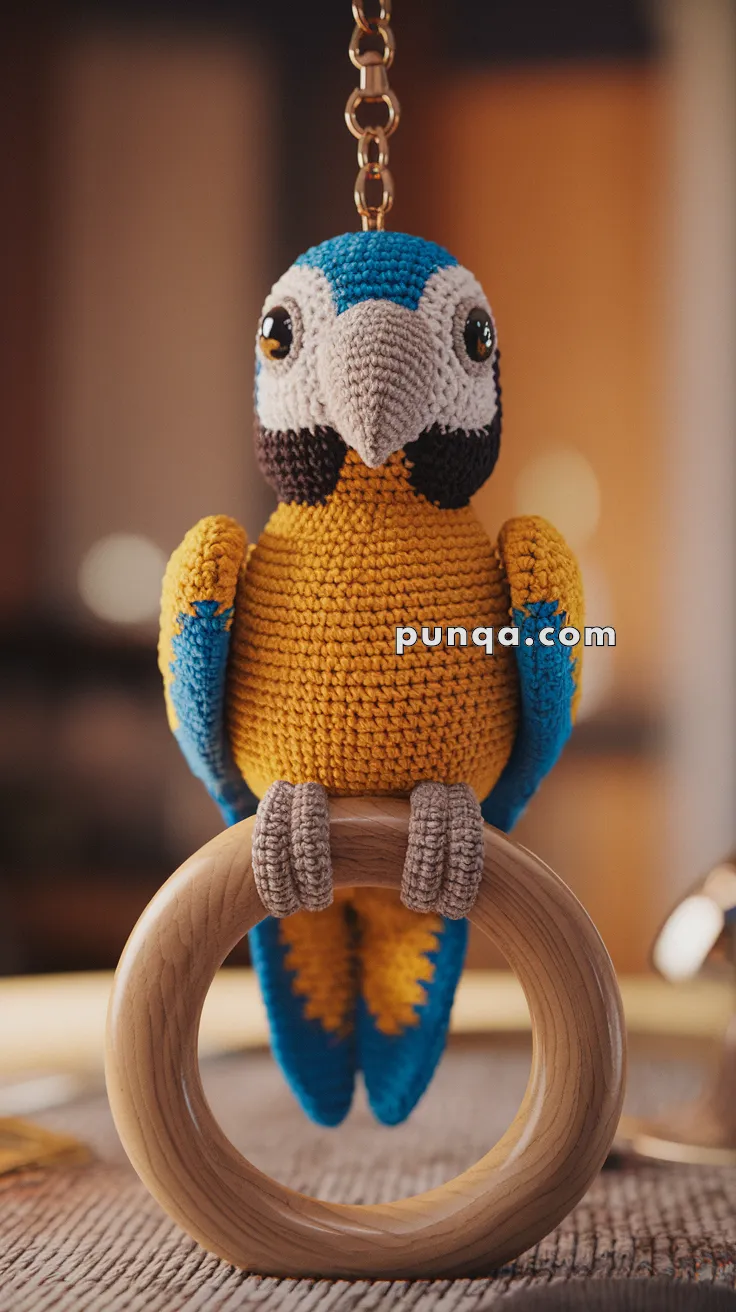
Bring a splash of tropical color to your everyday accessories with the Amigurumi Parrot Keychain, a crochet project that’s as vibrant as it is practical! 🦜🧶 Inspired by the blue-and-yellow macaw, this design features a rounded head with a sculpted beak, a white facial mask with dark cheek patches, compact folded wings, and a tapered tail. With separate crocheted feet that grip a wooden ring and a metal chain attached at the top, the parrot hangs naturally as if perched, adding a playful touch to your keys or bag.
Built for realism at a small scale, this sturdy little parrot is perfect as a keychain, bag charm, or thoughtful handmade gift for bird lovers. Fun to stitch and delightful to carry, the Amigurumi Parrot Keychain is a joyful way to crochet color, character, and a sprinkle of handmade magic—one loop at a time! ✨🌴🧵
🦜 Amigurumi Parrot Keychain Crochet Pattern
Add a splash of tropical color to your bag or keys with this charming Amigurumi Parrot Keychain! Inspired by a blue-and-yellow macaw, this little parrot sits proudly on a wooden ring and features vibrant feathers, a detailed beak, and playful expression. Perfect as a gift or decorative charm, this birdie is fun to make and sure to turn heads!
✨ Skill Level
Intermediate
(tight stitches, color changes, small parts, clean assembly)
📏 Finished Size
Approx. 13–15 cm (5–6 in) tall
(excluding chain)
🧶 Materials
Yarn (Sport or DK weight)
-
Blue – crown, wings, back, tail
-
Golden yellow – chest, belly, lower body
-
White – face mask
-
Dark brown / black – cheek patches
-
Light gray / beige – beak and feet
Notions
-
2.25–2.5 mm crochet hook
-
6 mm safety eyes
-
Polyester fiberfill
-
Yarn needle
-
Stitch marker
-
Wooden ring (5–6 cm / 2–2.5 in diameter)
-
Metal chain + jump ring (keychain hardware)
🧵 Abbreviations (US Terms)
MR, sc, inc, dec, sl st, ch, FO, st(s)
Work in continuous rounds unless stated otherwise.
🐦 Head & Body (One Piece)
Begin at the top of the head with blue.
R1: MR 6 (6)
R2: inc ×6 (12)
R3: (sc, inc) ×6 (18)
R4: (2 sc, inc) ×6 (24)
R5: (3 sc, inc) ×6 (30)
R6–7: sc around (30)
Face Mask
Switch to white.
R8–9: sc around (30)
Insert safety eyes between R8–9, spaced 7 sts apart.
Cheek Patches
Switch to dark brown / black.
R10: 6 sc (dark), 9 sc (white), 6 sc (dark), 9 sc (white) (30)
Switch back to white.
R11: sc around (30)
Chest & Body
Switch to yellow.
R12–18: sc around (30)
Begin stuffing firmly, shaping a rounded chest.
Lower Body
R19: (3 sc, dec) ×6 (24)
R20: sc around (24)
R21: (2 sc, dec) ×6 (18)
R22: sc around (18)
R23: (sc, dec) ×6 (12)
Finish stuffing.
R24: dec ×6 (6)
FO and close.
🦜 Beak (Make 1)
With light gray / beige.
R1: MR 6 (6)
R2: (sc, inc) ×3 (9)
R3–4: sc around (9)
R5: (sc, dec) ×3 (6)
Lightly stuff, pinch slightly to form a short triangular curve, FO.
Sew centered between the eyes, angled downward.
🪶 Wings (Make 2)
With blue.
R1: MR 6 (6)
R2: (sc, inc) ×3 (9)
R3–6: sc around (9)
Flatten slightly, do not stuff.
FO, leaving tail.
Sew flat to the sides of the body, starting just below the face mask and angling backward.
🪶 Tail (Make 1)
With blue, worked flat.
Ch 9
Row 1: sc in 2nd ch from hook, sc across (8)
Row 2: dec, sc 4, dec (6)
Row 3: dec, sc 2, dec (4)
Row 4: dec ×2 (2)
FO.
Add two short yellow surface stitches near the lower center of the tail to match the photo.
Sew centered at the back bottom of the body.
🐾 Feet (Make 2)
Feet are simple cylindrical grips, not individual toes.
With light gray / beige:
R1: MR 6 (6)
R2–6: sc around (6)
Do not stuff.
FO, leaving a long tail.
Wrap each foot snugly around the wooden ring and stitch closed underneath so they appear to grip the ring naturally.
🪵 Wooden Ring Perch
-
Slide both feet onto the ring
-
Center the body above the ring
-
Sew feet securely underneath the belly
-
Add a few hidden anchoring stitches between belly and ring for stability
(No glue required.)
🔗 Keychain Attachment
-
Attach the metal chain or jump ring directly through the top center of the head
-
Secure through several stitches
-
The parrot should hang straight while still resting on the ring
🧵 Final Shaping
-
Shape chest slightly forward
-
Keep wings snug to the body
-
Align tail straight and centered
-
Tighten all stitches around the feet and ring
🌿 Finished Result
The finished parrot should:
-
Hang upright and balanced
-
Sit naturally on the wooden ring
-
Have clean color transitions
-
Look realistic, compact, and sturdy
This tropical buddy is ready to perch on your bag, keys, or craft shelf—handmade with love and personality! 🧶🌴