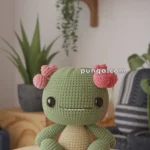
Meet Amigurumi Violet, a sweet and snuggly crochet companion who’s bursting with charm and cuddles! 💜🧶 Whether she’s a magical unicorn, a whimsical doll, or a soft plushie inspired by springtime blooms, Violet brings gentle personality and playful elegance to your handmade collection. With her soft curves, expressive features, and delightful color palette, she’s the kind of project that feels like a warm hug stitched into every loop.
Perfect for crocheters who love character-driven designs and thoughtful details, this pattern invites you to add your own creative touches—from curly manes and heart-shaped buttons to dreamy accessories and cozy textures. Whether you’re crafting a heartfelt gift or adding a new friend to your amigurumi lineup, Violet is a joyful way to stitch up sweetness—one magical loop at a time! 🌸🧵
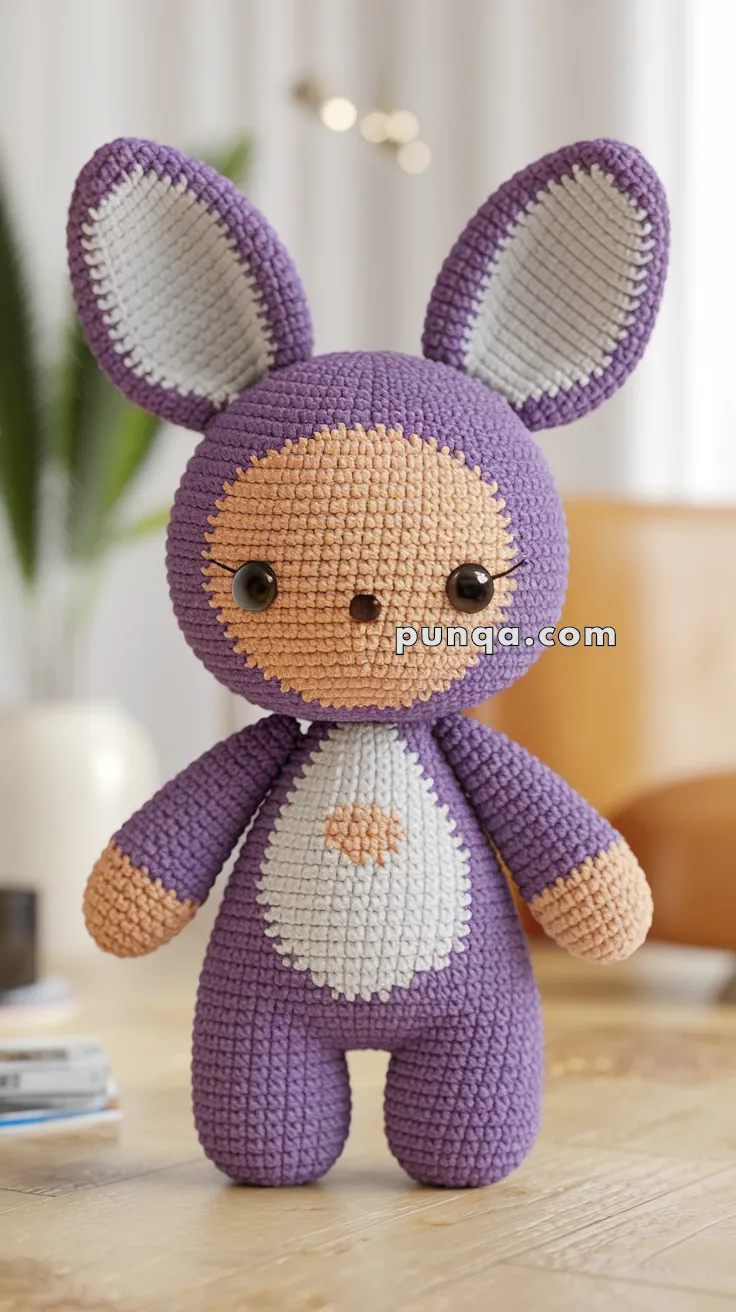
🐰 Amigurumi Violet Bunny Crochet Pattern
Meet Violet, the cuddly purple bunny with big ears and a sweet heart belly. This soft pastel cutie makes the perfect handmade gift for children, nurseries, or springtime décor.
✨ Skill Level
Confident Beginner → Intermediate
Includes color changes, appliqué sewing, and shaping.
📏 Finished Size
Approx. 26–28 cm (10–11 in) tall, standing
Made with DK yarn and a 3.0–3.25 mm hook
🧶 Materials
Yarn (DK weight recommended):
- Purple – main body, head, arms, legs, outer ears
- Peach – face patch, hands, feet, small belly heart
- White – belly patch, inner ears
Notions:
- 8–10 mm black safety eyes
- Black embroidery thread (lashes only)
- Polyester fiberfill
- Yarn needle
- Stitch marker
🪡 Abbreviations (US Terms)
MR – Magic Ring
sc – Single Crochet
inc – Increase (2 sc in one stitch)
dec – Decrease (sc2tog)
ch – Chain
sl st – Slip Stitch
FO – Fasten Off
🟣 Head (Purple)
MR, 6 sc (6)
inc x6 (12)
(1 sc, inc) x6 (18)
(2 sc, inc) x6 (24)
(3 sc, inc) x6 (30)
(4 sc, inc) x6 (36)
7–13. sc around (36)
Insert safety eyes between Rounds 8–9, spaced 7–8 stitches apart.
(4 sc, dec) x6 (30)
(3 sc, dec) x6 (24)
Stuff firmly
(2 sc, dec) x6 (18)
(1 sc, dec) x6 (12)
dec x6 (6)
FO, close neatly.
🧡 Face Patch (Peach – Rounded Oval, NOT Flat Appliqué)
Worked in continuous rounds for a slightly raised look.
MR, 6 sc (6)
inc x6 (12)
(1 sc, inc) x6 (18)
(2 sc, inc) x6 (24)
5–6. sc around (24)
FO, lightly stuff just enough to puff.
Sew centered on face so it sits flush and rounded, matching the photo.
💜 Body (Purple)
MR, 6 sc (6)
inc x6 (12)
(1 sc, inc) x6 (18)
(2 sc, inc) x6 (24)
(3 sc, inc) x6 (30)
(4 sc, inc) x6 (36)
7–15. sc around (36)
(4 sc, dec) x6 (30)
(3 sc, dec) x6 (24)
Stuff firmly, keeping a slightly pear-shaped silhouette
(2 sc, dec) x6 (18)
(1 sc, dec) x6 (12)
FO, leave tail for sewing head.
🤍 Belly Patch (White – Tall Oval)
MR, 6 sc (6)
inc x6 (12)
(1 sc, inc) x6 (18)
(2 sc, inc) x6 (24)
5–7. sc around (24)
FO.
Sew centered on body, extending vertically (longer than wide), matching the photo.
🧡 Small Belly Heart (Peach)
MR, 4 sc
inc x4 (8)
(sc, inc) x4 (12)
FO, flatten slightly.
Sew centered on the white belly patch.
💜 Arms (Make 2)
Start with peach hands.
MR, 6 sc (6)
2–4. sc around (6)
Switch to purple
5–12. sc around (6)
Stuff lightly.
FO.
Arms should be short, straight, and cylindrical, not wide or floppy.
💜 Legs (Make 2)
Start with peach feet.
MR, 6 sc (6)
inc x6 (12)
3–5. sc around (12)
Switch to purple
6–13. sc around (12)
Stuff firmly.
FO.
Legs are short and thick, giving the bunny a stable standing pose.
👂 Ears (Make 2)
Outer Ear (Purple)
MR, 6 sc (6)
inc x6 (12)
(1 sc, inc) x6 (18)
(2 sc, inc) x6 (24)
5–12. sc around (24)
FO.
Inner Ear (White)
MR, 6 sc (6)
inc x6 (12)
(1 sc, inc) x6 (18)
4–9. sc around (18)
FO.
Sew inner ear neatly inside outer ear.
Do not stuff.
Ears should remain upright and slightly curved, not floppy.
🧷 Assembly
- Add short black lashes only (no mouth embroidery)
- Sew head securely to body, centered
- Attach arms just below neckline
- Attach legs evenly so bunny stands flat
- Sew ears to top sides of head, angled slightly outward
- Sew face patch, then belly patch, then heart
- Embroider a tiny peach dot nose between eyes
📍 Violet Bunny – Placement Guide
1. Face Patch (Peach Oval)
- Place centered on the front of the head.
- Top of patch should sit around Row 6 of the head.
- Bottom of patch should reach about Row 14.
- Safety eyes: Insert at Rows 10–11, spaced ~10 stitches apart, inside the peach patch.
- Nose: Embroider a tiny dot with peach yarn between the eyes, ~2 rows below them.
2. Belly Patch (White Oval)
- Sew centered on the front of the body.
- Top of patch should begin around Row 5 of the body.
- Bottom of patch should reach around Row 13–14.
- Ensure the patch is wide enough to cover the belly front (about 70–75% width of the body).
3. Heart Appliqué (Peach)
- Place in the center of the white belly patch.
- Position the top of the heart ~2 rows below the start of the white patch.
- Bottom tip of the heart should point toward the lower third of the patch.
4. Arms & Legs
- Arms: Sew evenly at the sides, attaching just below the neckline, with peach ends facing forward.
- Legs: Attach symmetrically at the body base so bunny stands flat, peach feet visible in front.
5. Ears
- Position ears symmetrically at the very top of the head, slightly angled outward.
- White inner ear should face forward.
6. Tail (Optional)
- If adding, place at the center back of the body, about 2 rows above the base.