✨ Skill Level
Advanced Intermediate
You should be comfortable with:
-
Tight single crochet amigurumi
-
Sewing multiple parts
-
Color changes and layered garments
-
Surface embroidery
-
Small accessories (hat, sword, belt)
📏 Finished Size
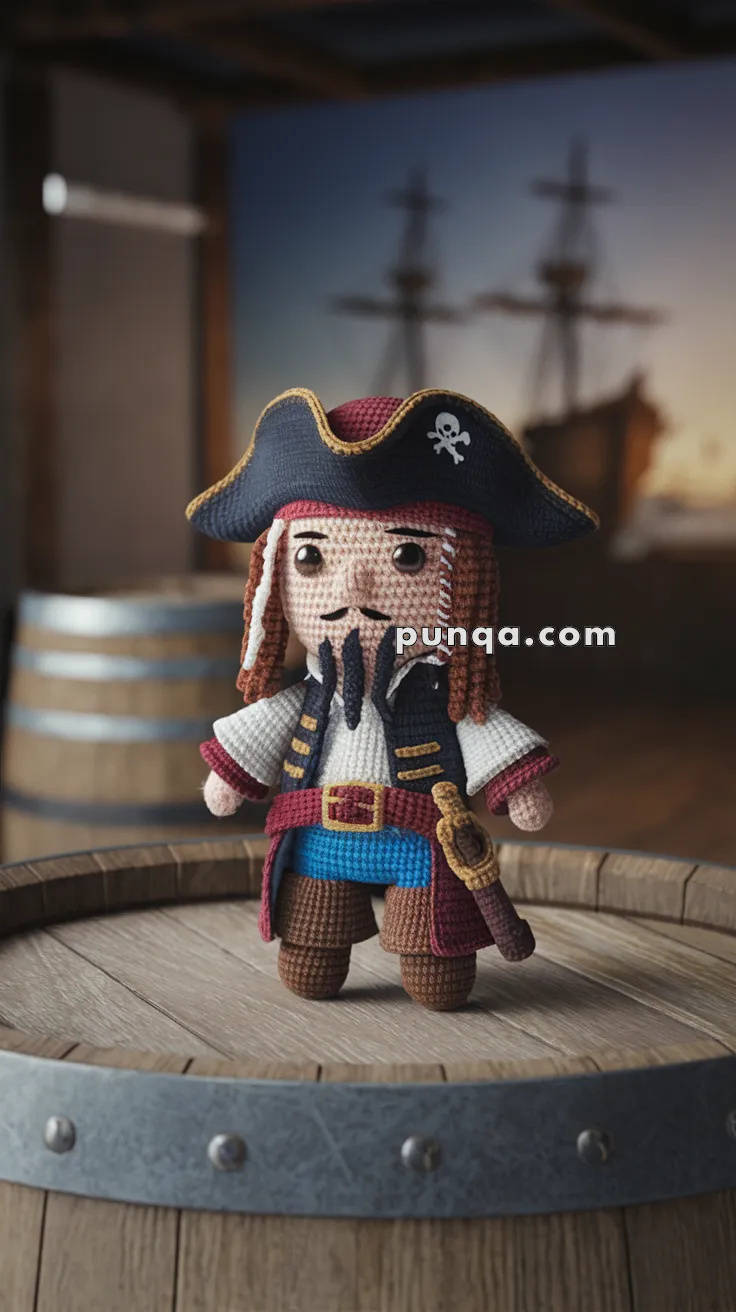
Approximately 24–26 cm (9.5–10.5 in) tall
(using DK yarn and a 2.5 mm hook)
Proportions match the photo:
-
Large rounded head
-
Compact torso
-
Short sturdy legs
-
Chunky rounded boots
-
Oversized tricorn hat
🧶 Materials
Yarn (DK cotton or similar matte yarn):
-
Light beige – skin
-
Medium brown – hair braids
-
Dark brown – pants & boots
-
Burgundy – coat, belt
-
Navy or black – hat exterior, vest
-
White – shirt
-
Blue – waist sash
-
Mustard yellow – coat trim & belt buckle
-
Black – facial embroidery
-
Off-white – skull emblem
Other Supplies:
-
2.5 mm crochet hook
-
8–9 mm safety eyes
-
Fiberfill stuffing
-
Yarn needle
-
Stitch marker
-
Scissors
🔤 Abbreviations (US Terms)
MR – magic ring
sc – single crochet
inc – increase (2 sc in one stitch)
dec – invisible decrease
ch – chain
sl st – slip stitch
FO – fasten off
BLO – back loop only
FLO – front loop only
🧑🦱 Head (Skin Tone)
R1: MR 6 (6)
R2: inc ×6 (12)
R3: (sc, inc) ×6 (18)
R4: (2 sc, inc) ×6 (24)
R5: (3 sc, inc) ×6 (30)
R6: (4 sc, inc) ×6 (36)
R7–R13: sc around (36)
Insert safety eyes between R9–R10, spaced about 7 stitches apart.
R14: (4 sc, dec) ×6 (30)
R15: (3 sc, dec) ×6 (24)
R16: (2 sc, dec) ×6 (18)
Stuff firmly
R17: (sc, dec) ×6 (12)
R18: dec ×6 (6)
FO and close.
🧔 Facial Hair (Photo-Accurate)
Goatee (Black or Dark Brown):
Cut 5 strands about 4 cm long. Attach under center of chin. Trim into two long tapered points.
Mustache (Make 2):
Ch 6, sl st back along chain.
Sew above goatee, angled slightly downward.
💇 Hair & Braids
Side Braids (Make 2 – Medium Brown):
Ch 14, sl st back along chain.
FO and sew one braid to each side of face.
Optional: wrap a tiny mustard stitch near the braid ends to suggest beads.
👕 Body (One Piece)
Shirt (White):
R1: MR 6 (6)
R2: inc ×6 (12)
R3: (sc, inc) ×6 (18)
R4: (2 sc, inc) ×6 (24)
R5: (3 sc, inc) ×6 (30)
R6–R9: sc around (30)
Waist Sash (Blue):
R10–R11: sc around (30)
Pants (Dark Brown):
R12–R16: sc around (30)
Stuff firmly.
R17: (3 sc, dec) ×6 (24)
R18: (2 sc, dec) ×6 (18)
R19: (sc, dec) ×6 (12)
R20: dec ×6 (6)
FO.
🦵 Legs (Make 2 – Dark Brown)
R1: MR 6 (6)
R2: inc ×6 (12)
R3–R6: sc around (12)
Stuff lightly. Do not close. Leave open to insert into boots.
👢 Boots / Feet (Make 2 – Dark Brown)
These boots are rounded, chunky, and flat on the bottom to match the photo.
Boot Sole:
R1: MR 6 (6)
R2: inc ×6 (12)
R3: (sc, inc) ×6 (18)
R4: (2 sc, inc) ×6 (24)
R5: BLO sc around (24)
R6–R8: sc around (24)
Boot Shaft:
R9: (3 sc, dec) ×6 (18)
R10–R12: sc around (18)
Stuff firmly but keep bottom flat.
FO, leave long tail.
Insert one leg into each boot and sew around opening securely.
Boot should be wider than leg for stability.
💪 Arms (Make 2)
Hand (Skin Tone):
R1: MR 6 (6)
R2: inc ×6 (12)
R3: sc around (12)
Sleeve (White):
R4–R6: sc around (12)
Stuff lightly.
FO and sew to body in relaxed downward position.
🧥 Coat (Burgundy – Flat Piece)
Ch 26
Row 1: sc across (25)
Rows 2–8: sc across
On final row, skip 3 center stitches to create front opening.
Surface embroider short mustard bars (3 per side) to match photo trim.
Sew coat only to shoulders and back so it hangs open.
🧢 Tricorn Hat
Crown (Navy/Black):
R1: MR 6 (6)
R2: inc ×6 (12)
R3: (sc, inc) ×6 (18)
R4: (2 sc, inc) ×6 (24)
R5: (3 sc, inc) ×6 (30)
R6: (4 sc, inc) ×6 (36)
R7–R9: sc around (36)
Brim:
R10: BLO inc all around (72)
R11–R12: sc around (72)
Switch to burgundy:
R13–R14: sc around
FO. Fold brim upward in three points and tack into tricorn shape.
Skull Emblem:
Embroider or applique a small off-white skull on the right front side.
🧷 Belt & Accessories
Belt (Burgundy):
Ch 28, sc 2 rows.
Embroider mustard buckle.
Sword:
Handle: ch 6, sc back.
Sheath: small brown rectangle.
Attach to right side of belt.
🧵 Assembly Order
1️⃣ Attach boots to legs
2️⃣ Sew legs + boots to body
3️⃣ Attach arms
4️⃣ Sew head to body (no visible neck)
5️⃣ Add goatee, mustache, and braids
6️⃣ Dress with coat
7️⃣ Attach belt and sword
8️⃣ Place hat slightly tilted backward
⚓ Finishing Touches
-
Shape hat and boots by hand
-
Angle sword slightly forward
-
Let beard strands hang naturally
-
Ensure coat trim and sash are visible
-
Adjust stance so doll stands balanced
🏴☠️ Final Thoughts
This pirate captain doll is all about character, layers, and silhouette. With chunky boots, braided hair, flowing coat, and iconic tricorn hat, the finished piece captures the exact look and posture seen in the photo. Every element — from facial hair to sash and sword — contributes to a truly display-worthy amigurumi figure.
A rewarding project for experienced crocheters who love bringing detailed characters to life. 🧶⚓
Happy crocheting, and may your yarn sail the seven seas! 🌊🏴☠️