Get ready to add a dash of woodland charm to your holiday season with the Amigurumi Christmas Fox With Bow Tie, a festive crochet cutie that’s dressed to impress! 🦊🎄 With his cozy red fur, twinkling eyes, and a dapper little bow tie, this fox is all about spreading cheer in the most adorable way. Whether he’s nestled under the tree, perched on a mantel, or gifted to someone special, he’s sure to bring smiles and snuggly vibes all season long.
Perfect for crocheters who love character-rich designs and seasonal flair, this pattern invites you to play with warm colors, soft textures, and sweet details like a tiny gift or holly accent. Make him as a standalone holiday mascot or pair him with other festive amigurumi for a full winter wonderland scene. The Amigurumi Christmas Fox With Bow Tie is a joyful way to stitch up coziness, charm, and a whole lot of handmade magic—one loop at a time! 🧶🎁
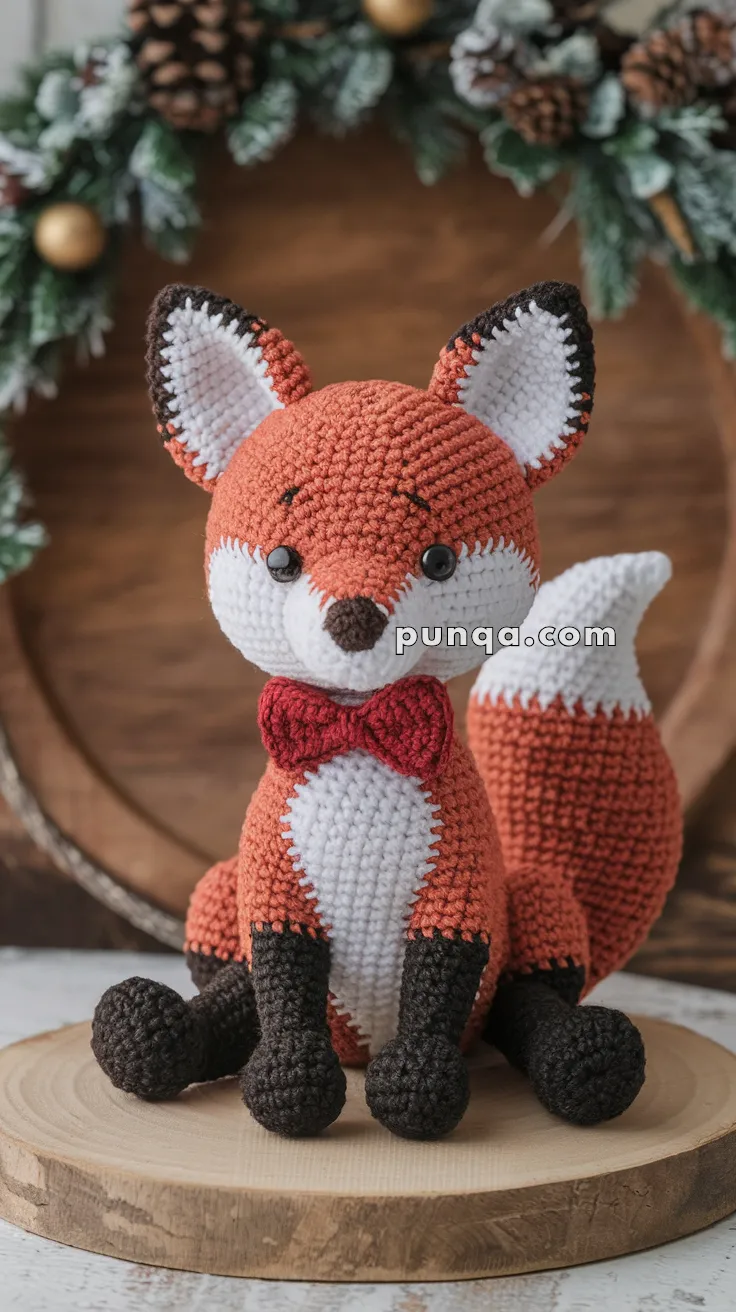
🦊Amigurumi Christmas Fox with Bow Tie Crochet Pattern
Bring festive woodland magic into your home with this dapper Christmas Fox! With his fluffy chest, upright tail, bright red bow tie, and perfectly shaped white muzzle, he’s ready to charm everyone this holiday season.
✨ Skill Level
Intermediate – Features shaping, color changes, and detailed assembly.
📏 Finished Size
Approximately 25 cm (10 inches) tall using worsted weight yarn and a 3.5 mm crochet hook.
Materials
Yarns (Worsted Weight):
-
Rust Orange – main body, head, outer ears, tail
-
White – muzzle, inner ears, chest patch, tail stripes & tip
-
Dark Chocolate Brown – paws, nose, ear border
-
Red – bow tie
Other Supplies:
-
3.5 mm crochet hook
-
10 mm safety eyes
-
Black embroidery thread for brows
-
Polyester stuffing
-
Tapestry needle, stitch marker, scissors
Abbreviations (US Terms)
-
MR – magic ring
-
sc – single crochet
-
inc – increase (2 sc in same st)
-
dec – decrease (sc2tog INV dec recommended)
-
sl st – slip stitch
-
ch – chain
-
st(s) – stitch(es)
-
FO – fasten off
-
BLO – back loop only
Worked in continuous rounds unless stated.
Head (Rust with White Muzzle)
Start in rust.
R1: MR, 6 sc (6)
R2: inc x6 (12)
R3: (sc, inc) x6 (18)
R4: (2 sc, inc) x6 (24)
R5: (3 sc, inc) x6 (30)
R6: (4 sc, inc) x6 (36)
R7: (5 sc, inc) x6 (42)
Begin muzzle shaping by switching to white only at the center front:
R8: 10 white (muzzle front), 32 rust (42)
R9: 14 white, 28 rust (42)
R10: 14 white, 28 rust (42)
Place eyes between R10–11, spaced about 9–10 sts apart, slightly outside the white field.
R11: 12 white, 30 rust (42)
R12: 10 white, 32 rust (42)
R13: 8 white, 34 rust (42)
R14–16: all rust (42)
Begin shaping top of head:
R17: (5 sc, dec) x6 (36)
R18: (4 sc, dec) x6 (30)
R19: (3 sc, dec) x6 (24)
R20: (2 sc, dec) x6 (18)
R21: (sc, dec) x6 (12)
R22: dec x6 (6)
FO, close and stuff firmly.
Details:
-
Nose: dark brown triangle embroidered at lower center of muzzle
-
Brows: two short, slightly curved slanted lines
Ears (Make 2)
Inner Ear (White)
R1: MR, 6 sc
R2: (sc, inc) x3 (9)
R3: (2 sc, inc) x3 (12)
R4: sc around (12)
FO, leave tail.
Outer Ear (Rust with Brown Edge)
R1: MR, 6 sc
R2: (sc, inc) x3 (9)
R3: (2 sc, inc) x3 (12)
R4: (3 sc, inc) x3 (15)
R5–6: sc around (15)
Change to dark brown:
R7: sl st around entire ear edge
FO.
Place inner ear centered inside outer ear, sew together.
Sew ears high on head, slightly angled outward.
Body (Pear-Shaped Form)
Start with rust.
R1: MR, 6 sc (6)
R2: inc x6 (12)
R3: (sc, inc) x6 (18)
R4: (2 sc, inc) x6 (24)
R5: (3 sc, inc) x6 (30)
R6: (4 sc, inc) x6 (36)
R7: (5 sc, inc) x6 (42)
Lower torso widening:
R8–12: sc around (42)
Hip shaping:
R13: (6 sc, inc) x6 (48)
R14–16: sc around (48)
Begin narrowing upward:
R17: (6 sc, dec) x6 (42)
R18: sc around (42)
R19: (5 sc, dec) x6 (36)
R20–22: sc around (36)
R23: (4 sc, dec) x6 (30)
R24: (3 sc, dec) x6 (24)
R25–26: sc around (24)
Stuff body firmly.
FO, leaving long tail.
Sew head on securely.
Chest Patch (Smooth Oval)
With white:
R1: MR, 6 sc
R2: inc x6 (12)
R3: (sc, inc) x6 (18)
R4: (2 sc, inc) x6 (24)
R5–7: sc around (24)
R8: (2 sc, dec) x6 (18)
R9: (sc, dec) x6 (12)
FO, leave long tail.
Shape into elongated oval and sew centered down front, point toward neck, wider at bottom. Smooth edge only — no spikes.
Front Legs (2)
Begin in brown.
R1: MR, 6 sc
R2: inc x6 (12)
R3–4: sc around (12)
Change to rust:
R5: (4 sc, dec) x2 (10)
R6–10: sc around (10)
Stuff lightly through ankle only.
FO, leave tail. Attach legs firmly at the lower front sides so they sit forward and touching the ground.
Back Legs (2)
Begin brown.
R1: MR, 6 sc
R2: inc x6 (12)
R3–4: sc around (12)
Change to rust:
R5: (3 sc, dec) x3 (9)
R6–8: sc around (9)
Stuff lightly.
FO and attach at sides of hips, angled slightly forward.
Tail (Rust with White Bands)
Begin rust.
R1: MR, 6 sc
R2: inc x6 (12)
R3: (sc, inc) x6 (18)
R4: (2 sc, inc) x6 (24)
R5–8: sc around (24)
First white ring:
R9: change to white, sc around (24)
Return to rust:
R10–13: rust sc around (24)
Main white tip:
R14–16: change to white, sc around (24)
Taper:
R17: (2 sc, dec) x6 (18)
R18: (sc, dec) x6 (12)
R19: dec x6 (6)
Stuff lightly.
FO. Attach high on body rear, angled upward.
Bow Tie (Make Full Bow)
Make two rectangles.
With red:
Ch 13
Row 1: sc in 2nd ch and across (12)
Rows 2–6: ch 1, turn, sc across (12)
FO.
Stack rectangles.
Wrap center with red yarn tightly several times.
Sew under chin.
Final Assembly
-
Sew head onto body.
-
Attach ears symmetrically.
-
Sew chest patch centered from base of neck down belly.
-
Attach front legs with feet touching ground.
-
Sew back legs slightly forward to support sitting position.
-
Attach tail high and curved upward.
-
Place bow tie under neck.
-
Add embroidered details:
-
Tiny nose triangle
-
Brows above eyes
-
Shape stuffing so hips are wide and body narrows toward neck. Adjust tail angle for upright form.
Display Suggestions
-
Sit fox on a wood slice
-
Add winter greenery around base
-
Place near festive décor for seasonal charm
This fox makes a wonderful gift, mantle display companion, or woodland accent for your holiday home. Its rounded sitting shape, smooth chest patch, tapered muzzle, banded tail, and classic bow tie bring character and warmth to any space.