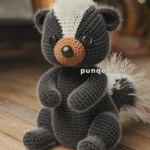
Stitch up a bundle of tail-wagging joy with this Amigurumi Beagle Puppy crochet pattern! With its floppy ears, soulful eyes, and classic tri-color coat, this cuddly pup captures all the charm of the beloved Beagle breed in soft, squishy stitches. Whether you’re crafting a tribute to your own furry friend, making a heartfelt gift for a dog lover, or simply adding to your amigurumi kennel, this pattern lets you crochet a loyal companion full of personality and warmth. 🐾🧶🐶
Designed for detail and delight, this pattern invites you to play with rich yarn tones, expressive features, and fun extras like a tiny collar, name tag, or even a mini leash. Customize the markings to match a real-life pup or go whimsical with pastel hues and playful accessories. Whether perched on a shelf, tucked into a gift box, or guarding your craft corner, this Beagle Puppy Amigurumi is a joyful and satisfying project—perfect for bringing a touch of handmade devotion to every stitch! 💖✨🐕
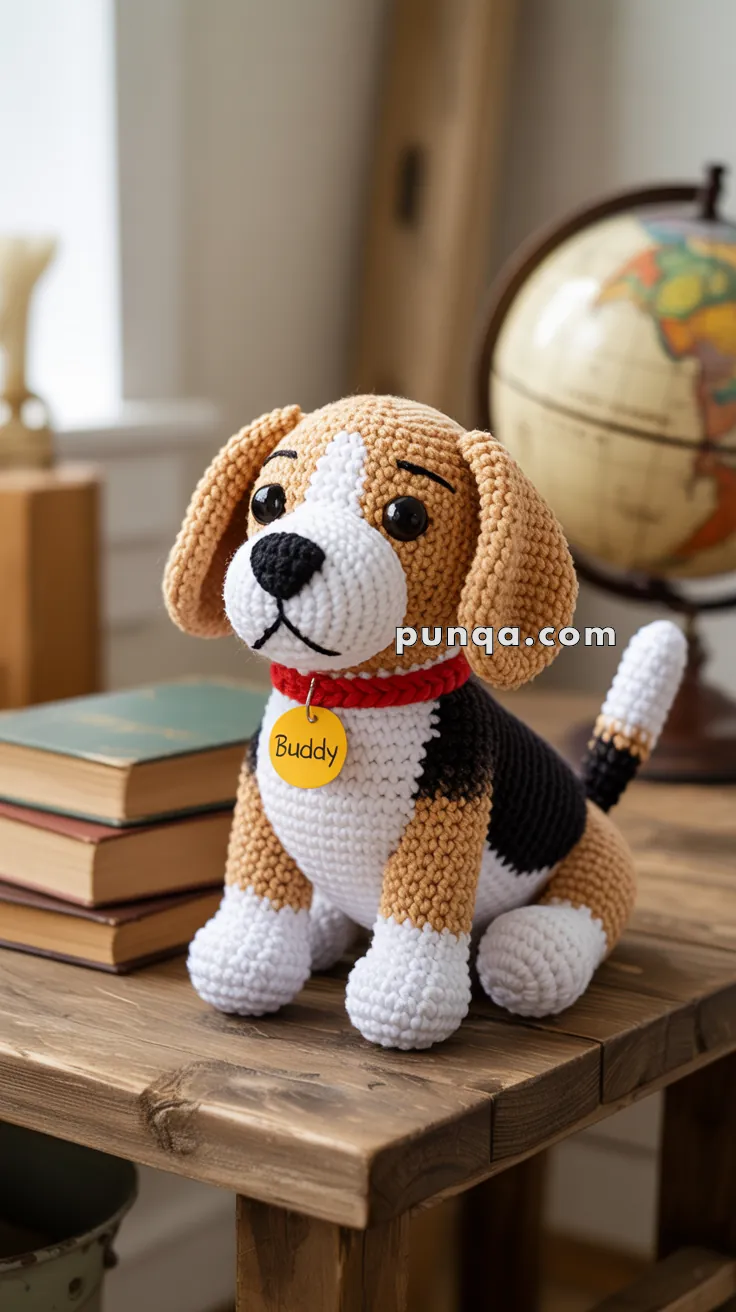
🐾 Amigurumi Beagle Puppy “Buddy” Crochet Pattern
Meet Buddy, the sweetest handmade beagle puppy with big floppy ears, a tri-colored coat, and his own red collar with a name tag. This project captures the classic beagle look with its white blaze, brown head and legs, black saddle back, and white-tipped tail. Perfect as a heartfelt gift or a keepsake for dog lovers!
✨ Skill Level
Intermediate – requires shaping, color changes, and sewing pieces together.
📏 Finished Size
Approx. 8–10 inches (20–25 cm) tall when made with DK yarn and a 2.5–3.5 mm hook.
🧶 Materials
- Color A: White (snout, blaze, chest, paws, tail tip)
- Color B: Light Brown (head, ears, legs, tail base)
- Color C: Black (back, tail middle, eyebrows, mouth)
- Color D: Red (collar)
- Color E: Yellow (name tag)
Other supplies:
- 2.5–3.5 mm crochet hook
- Safety eyes (12 mm)
- Polyfill stuffing
- Stitch marker
- Tapestry needle & scissors
- Black embroidery thread/yarn for details
🧵 Abbreviations (US Terms)
- MR – Magic Ring
- sc – Single Crochet
- inc – Increase (2 sc in same st)
- dec – Decrease (sc2tog)
- sl st – Slip Stitch
- FO – Fasten Off
🐾 Pattern Instructions
Head (Start with Color A – White for Snout/Blaze)
R1: MR, 6 sc (6)
R2: inc ×6 (12)
R3: (1 sc, inc) ×6 (18)
R4: (2 sc, inc) ×6 (24)
R5: (3 sc, inc) ×6 (30)
R6: (4 sc, inc) ×6 (36)
R7–9: sc around (36) – this forms the white snout area
👉 Switch to Color B (Light Brown)
R10–16: sc around (36)
R17: (4 sc, dec) ×6 (30)
R18: (3 sc, dec) ×6 (24)
R19: (2 sc, dec) ×6 (18)
📍 Insert safety eyes between Rnds 9–10, approx. 8–9 sts apart, just at edges of blaze.
📍 Stuff firmly.
R20: (1 sc, dec) ×6 (12)
R21: dec ×6 (6)
FO, close.
Blaze Patch (Color A – White)
Ch 9.
Row 1: sc in 2nd ch, sc across, turn (8).
Row 2–8: sc across (8).
Row 9: dec at each end (6).
Row 10: dec at each end (4).
Row 11: dec across (2). FO.
📍 Sew from top of snout up between eyes, tapering the top for natural look.
Snout (Color A – White)
R1: MR, 6 sc (6)
R2: inc ×6 (12)
R3: (1 sc, inc) ×6 (18)
R4–6: sc around (18)
Stuff lightly. FO, leaving long tail.
Nose (Color C – Black):
R1: MR, 6 sc (6). FO, sew to tip of snout.
Attach snout just below eyes, with blaze continuing upward.
Ears (Make 2 – Color B)
R1: MR, 6 sc (6)
R2: inc ×6 (12)
R3: (1 sc, inc) ×6 (18)
R4–12: sc around (18)
R13: (1 sc, dec) ×6 (12)
R14–16: sc around (12)
Flatten, FO.
📍 Sew at eye level, slightly forward, so they drape naturally.
Body (Start with Color A – White Chest)
R1: MR, 6 sc (6)
R2: inc ×6 (12)
R3: (1 sc, inc) ×6 (18)
R4: (2 sc, inc) ×6 (24)
R5: (3 sc, inc) ×6 (30)
R6: (4 sc, inc) ×6 (36)
R7–8: sc around (36) – chest remains white here
👉 Switch to Color C (Black) for back
R9–16: sc around (36)
R17: (4 sc, dec) ×6 (30)
R18: (3 sc, dec) ×6 (24)
R19: (2 sc, dec) ×6 (18)
Stuff firmly.
R20: (1 sc, dec) ×6 (12)
R21: dec ×6 (6). FO.
Front Legs (Make 2 – Color A → B)
R1: MR, 6 sc (6)
R2: inc ×6 (12)
R3: (1 sc, inc) ×6 (18)
R4–6: sc around (18) – white paw
👉 Switch to Color B (Brown)
R7–12: sc around (18) – upper leg
Stuff lightly, FO.
Back Legs (Make 2 – Color A → B)
R1: MR, 6 sc (6)
R2: inc ×6 (12)
R3: (1 sc, inc) ×6 (18)
R4–6: sc around (18) – white paw
👉 Switch to Color B (Brown)
R7–10: sc around (18)
R11: (2 sc, dec) ×4, sc 2 (14)
R12–13: sc around (14)
Stuff firmly, FO.
📍 Sew in sitting position.
Tail (White → Black → Brown)
R1: MR, 6 sc (6)
R2: (1 sc, inc) ×3 (9)
R3–4: sc around (9) – Color A (White tip)
👉 Switch to Color C (Black middle)
R5–8: sc around (9)
👉 Switch to Color B (Brown base)
R9–12: sc around (9)
Stuff lightly, FO. Sew to back of body.
Collar (Color D – Red)
Ch 32–36 (fit around neck). Join into loop.
R1: sc in each ch. Join. FO.
Tag (Color E – Yellow)
R1: MR, 6 sc (6)
R2: inc ×6 (12)
FO, sew to collar.
Write or embroider “Buddy” with black thread.
Face Details
- Eyebrows: Embroider small black arches above eyes.
- Mouth: Stitch thin black line from under nose downward.
🪡 Assembly
- Sew head to body securely.
- Attach front legs under chest, back legs in sitting position.
- Add tail at back.
- Sew ears slightly forward at eye level.
- Attach snout + blaze patch.
- Add safety eyes, nose, mouth, and eyebrows.
- Fit collar and tag.
🎉 Finished Look
Your Buddy the Beagle Puppy is complete! 🐾 With his floppy brown ears, white blaze, tri-color body, red collar, and name tag, he looks just like the loyal pup in the photo – ready to sit proudly on your desk, shelf, or gift box.