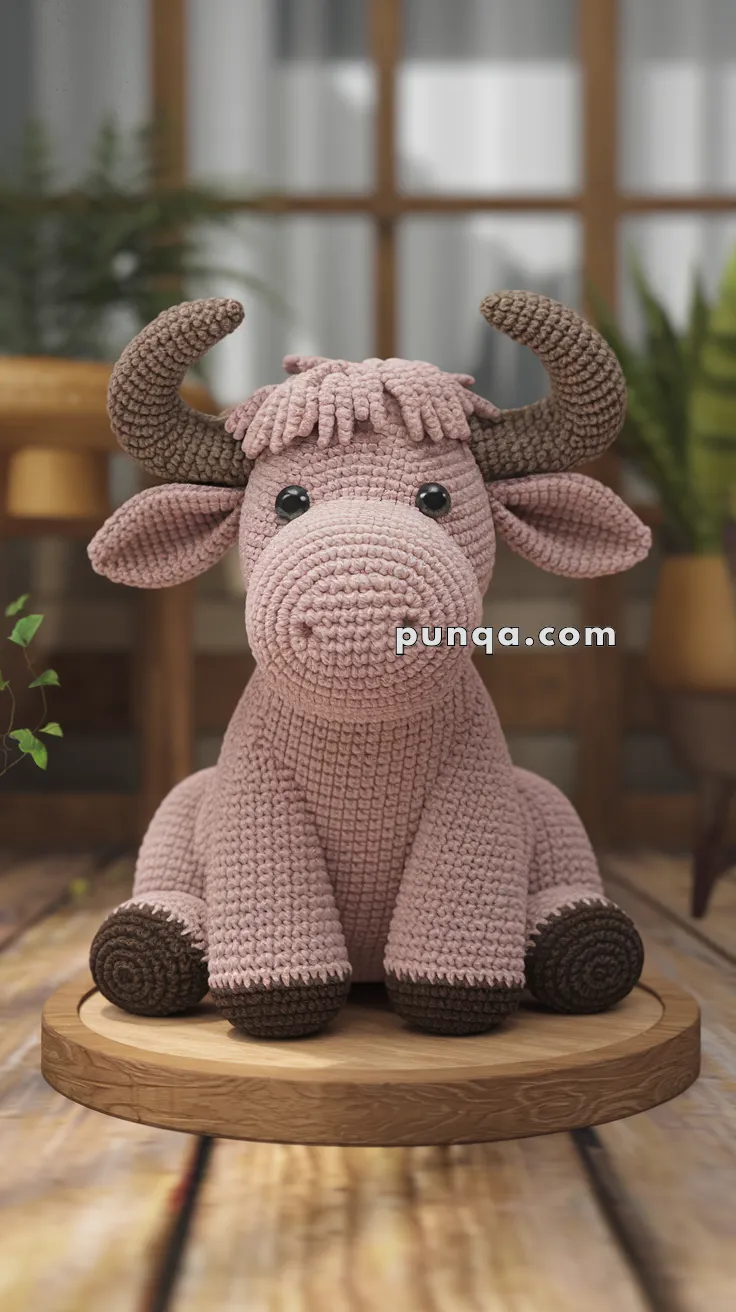
Say hello to the Amigurumi Water Buffalo, a gentle giant in miniature form that’s ready to graze its way into your heart! 🐃🧶 With its sturdy body, curved horns, and calm expression, this crochet creation captures the peaceful spirit of one of nature’s most hardworking animals. Whether you’re crafting for a farm-themed collection, a cultural celebration, or simply adding a unique friend to your amigurumi herd, this buffalo brings strength and sweetness in every stitch.
Perfect for crocheters who enjoy bold shapes and earthy details, this pattern invites you to explore textured yarns, natural tones, and expressive features. Add a tiny bell, stitch on a tufted tail, or pair it with other barnyard buddies for a full handmade pasture. The Amigurumi Water Buffalo is a heartwarming way to stitch up resilience, charm, and a whole lot of handmade harmony—one loop at a time! 🧵🌾
🐃 Amigurumi Water Buffalo Crochet Pattern
Looking for a mighty but gentle companion? This cuddly water buffalo amigurumi is here to bring rustic charm to your crochet collection! With its big curved horns, fluffy fringe, and sturdy little hooves, this plush makes the perfect gift for farm and wildlife lovers alike.
✨ Skill Level
Intermediate — shaping, multi-part assembly, horns, and fringe detailing.
📏 Finished Size
Approx. 26–30 cm (10–12 inches) tall seated
🧶 Materials
Worsted or velvet/chenille yarn:
- Dusty pink / taupe — body, head, legs, ears
- Dark brown — hooves & horns
Tools:
- 4.0 mm crochet hook (for velvet)
- 3.0–3.5 mm hook (for worsted)
- 12–14 mm safety eyes
- Polyester stuffing
- Yarn needle
- Stitch marker
- Scissors
🧵 Abbreviations (US)
MR – magic ring
sc – single crochet
inc – increase
dec – decrease
sl st – slip stitch
ch – chain
FO – fasten off
🔘 Head + Snout (Worked as One Piece)
Start in main color (pink/taupe)
MR 6
inc x6 (12)
(1 sc, inc) x6 (18)
(2 sc, inc) x6 (24)
(3 sc, inc) x6 (30)
(4 sc, inc) x6 (36)
(5 sc, inc) x6 (42)
Rounds 8–13: sc around (42)
Create snout bulge:
(5 sc, inc) x6 (48)
Rounds 15–17: sc around (48)
(6 sc, dec) x6 (42)
Rounds 19–21: sc around (42)
Insert safety eyes between rounds 10–11, 8 sts apart.
(5 sc, dec) x6 (36)
(4 sc, dec) x6 (30)
(3 sc, dec) x6 (24)
(2 sc, dec) x6 (18)
(1 sc, dec) x6 (12)
dec x6 (6)
Stuff firmly, shaping snout forward.
FO and close.
Embroider two small nostrils.
👂 Ears (Make 2)
Ch 6
Sc in 2nd ch, hdc, dc, 3 dc in last st
Work opposite side: dc, hdc, sc
FO
Sew wide and floppy under horns.
🧷 Horns (Make 2 – Dark Brown)
MR 6
(1 sc, inc) x3 (9)
(2 sc, inc) x3 (12)
Rounds 4–10: sc around (12)
(2 sc, dec) x3 (9)
Rounds 12–22: sc around (9)
Lightly stuff.
Bend into curved crescent shape.
Sew high on head sides.
🪶 Hair Fringe (Bangs)
Cut 18–22 strands (6–7 cm long).
Latch-hook across forehead between horns.
Trim into rounded fringe.
🪶 Body
MR 6
inc x6 (12)
(1 sc, inc) x6 (18)
(2 sc, inc) x6 (24)
(3 sc, inc) x6 (30)
(4 sc, inc) x6 (36)
(5 sc, inc) x6 (42)
Rounds 8–20: sc around (42)
(5 sc, dec) x6 (36)
(4 sc, dec) x6 (30)
(3 sc, dec) x6 (24)
(2 sc, dec) x6 (18)
(1 sc, dec) x6 (12)
dec x6 (6)
Stuff firmly into egg shape.
FO and close.
🦵 Front Legs (Make 2 – Thick Sitting Legs)
Start in dark brown (hooves):
MR 6
inc x6 (12)
(1 sc, inc) x6 (18)
Rounds 4–6: sc around (18)
Switch to body color:
Rounds 7–18: sc around (18)
Stuff firmly.
Flatten slightly at top.
FO.
🦵 Back Legs (Make 2 – Support Base)
Same as front legs but only 14 rounds total for shorter height.
🧷 Assembly
- Sew head to body centered
- Attach front legs forward for seated pose
- Attach back legs slightly behind
- Sew ears under horns
- Attach horns high and angled upward
- Add fringe bangs
- Shape snout and legs firmly
🌟 Final Touch
Your water buffalo is now complete — calm, sturdy, and irresistibly cuddly. With its thick curved horns, gentle eyes, oversized snout, and soft fringe, this plush perfectly captures the peaceful strength of a real buffalo. Whether perched on a shelf, styled in a nursery, or gifted to an animal lover, this gentle giant will always steal hearts.
Happy crocheting! 🧶🐃✨