Bring the bold and intricate beauty of a Scorpion to life with this Amigurumi Scorpion crochet pattern! 🦂✨ With its segmented body, curved tail, and detailed pincers, this design captures the essence of this fascinating creature in yarn form. Whether you’re crafting for a nature-inspired décor piece, a unique gift, or simply love insect-themed amigurumi, this FREE pattern is a striking addition to your collection.
Designed for intermediate to advanced crocheters, this pattern allows for customization in body textures, tail curvature, and even tiny accessories like embroidered details or a miniature habitat to enhance its personality. Choose classic earthy browns and blacks for a realistic look or experiment with vibrant hues for a whimsical twist! Whether displayed as part of a wildlife setup or gifted to a fellow crochet enthusiast, this amigurumi scorpion is sure to impress.
Grab your hook, select your favorite yarn, and let’s bring this fierce little creature to life—one stitch at a time! 🧶✨
🦂 Amigurumi Scorpion Crochet Pattern
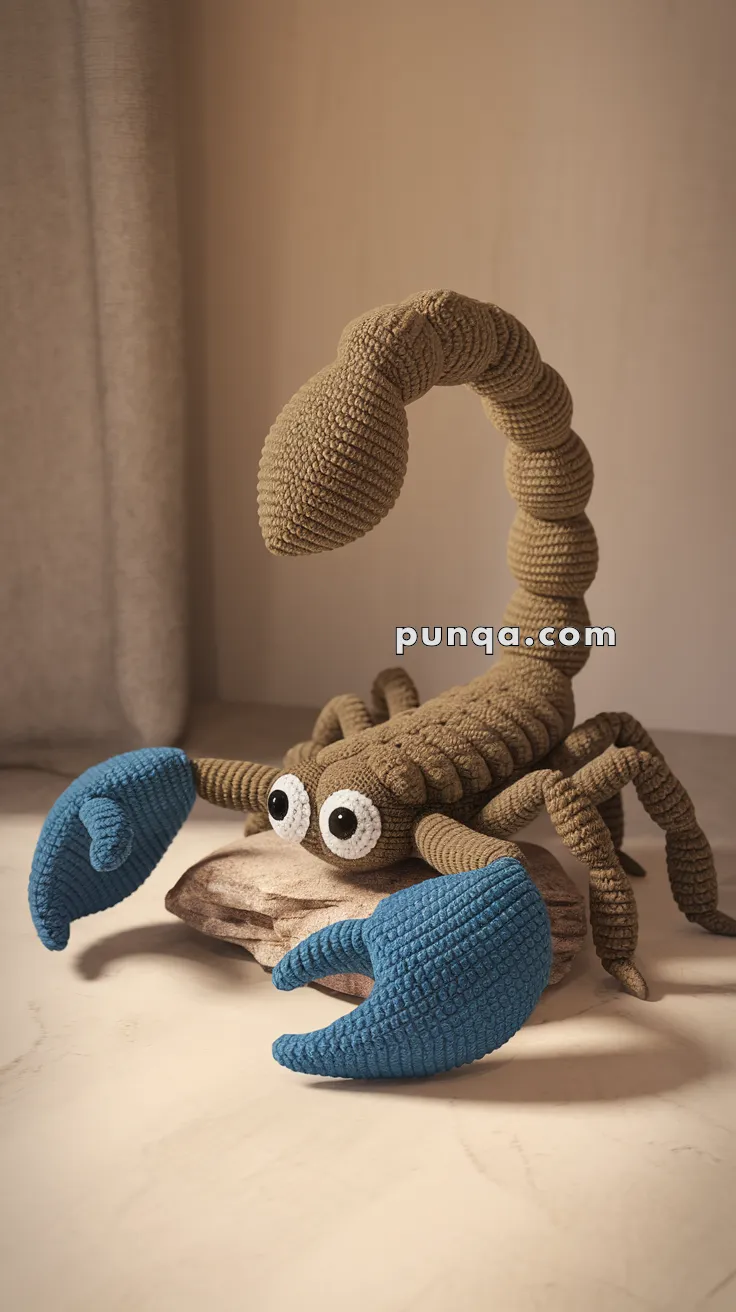
This sculptural amigurumi scorpion features a compact segmented body, oversized soft blue claws, eight articulated legs, and a dramatically arched tail that can be posed and held in place with hidden wire. Its expressive wide eyes and sturdy stance give it a playful yet realistic desert-creature look, making it a striking decor piece or collectible plush.
✨ Skill Level
Intermediate
(Includes segmentation, shaping, multi-part assembly, and optional wiring)
📏 Finished Size
Approx. 30–32 cm (12–13 in) from claw tip to tail curve
(using worsted yarn and a 3.5–4 mm hook)
🧶 Materials
Yarn (worsted weight):
-
Taupe / sand brown – body, legs, tail (120–140 g)
-
Muted denim blue – claws (35–45 g)
-
White – eye whites (5 g)
-
Black – pupils (scrap)
Tools & Notions:
-
Crochet hook: 3.5–4 mm
-
Safety eyes: 10–12 mm black (or crocheted pupils)
-
Polyester fiberfill
-
Tapestry needle
-
Stitch marker
-
2 mm aluminum wire or floral wire (≈ 40–45 cm for tail)
-
Optional: pipe cleaners for legs
🪡 Abbreviations (US Terms)
MR – Magic Ring
sc – Single crochet
inc – Increase
dec – Decrease
sl st – Slip stitch
FO – Fasten off
ch – Chain
🟤 Main Body (Single Piece)
The body is low and oval, not tall.
R1: MR 6
R2: inc ×6 (12)
R3: (sc, inc) ×6 (18)
R4: (2 sc, inc) ×6 (24)
R5: (3 sc, inc) ×6 (30)
R6–R12: sc around (30)
Begin narrowing slightly toward the back:
R13: (3 sc, dec) ×6 (24)
R14–R15: sc around (24)
Stuff firmly but keep the body flattened rather than round.
R16: (2 sc, dec) ×6 (18)
R17: sc around (18)
R18: (sc, dec) ×6 (12)
R19: dec ×6 (6)
FO and close.
👀 Eyes (Make 2)
White Eye Base
R1: MR 6
R2: inc ×6 (12)
FO, flatten slightly.
Black Pupil
R1: MR 5
sl st, FO.
Sew pupil centered on white base.
Attach eyes to the very front of the body, sitting wide and slightly raised.
🌀 Tail (Segmented, Poseable)
The photo shows 6 narrow segments + a bulbous stinger, smoothly transitioning upward.
Tail Segments (Make 6)
Each segment:
R1: MR 6
R2: (sc, inc) ×3 (9)
R3–R6: sc around (9)
Stuff lightly.
FO, leave long tails.
Stinger (Larger End Segment)
R1: MR 6
R2: inc ×6 (12)
R3: (sc, inc) ×6 (18)
R4–R6: sc around (18)
R7: (sc, dec) ×6 (12)
R8: dec ×6 (6)
Stuff firmly and FO.
🔩 Tail Wiring Option (Recommended)
-
Cut 40–45 cm aluminum wire
-
Insert wire through all tail segments before sewing them together
-
Push wire slightly into the body back for anchoring
-
Sew segments end-to-end snugly around the wire
-
Bend tail into the upright forward curl shown in the photo
-
Adjust curve after full assembly
✋ Claws (Make 2 – Blue)
Oversized, rounded, soft — the claws are a key visual feature.
Claw Base
R1: MR 6
R2: inc ×6 (12)
R3: (sc, inc) ×6 (18)
R4–R8: sc around (18)
Stuff firmly.
R9: (sc, dec) ×6 (12)
R10–R11: sc around (12)
FO.
Pincers (Make 2 per Claw)
R1: MR 5
R2: inc ×5 (10)
R3–R4: sc around (10)
R5: dec ×5 (5)
FO.
Sew pincers to the front, slightly offset and curved inward.
Attach finished claws to the front sides of the body, angled outward.
🦵 Legs (Make 8)
The scorpion has four legs per side, tubular and slightly bent.
Each leg:
R1: MR 6
R2: sc around (6)
R3–R10: sc around (6)
Stuff lightly.
Optional shaping:
-
Insert pipe cleaner or thin wire
-
Bend gently at “knee”
FO, leave tail.
Sew legs evenly along the underside edges of the body, with a slight forward lean.
🧵 Final Assembly
-
Sew eyes first
-
Attach claws at the front sides
-
Anchor wired tail securely at the back center
-
Sew legs in pairs from front to back
-
Adjust tail curve and leg stance for balance
💫 Finishing Touches
-
Shape tail into a dramatic arc
-
Slightly angle eyes outward for expression
-
Ensure claws sit forward and visible
-
Weave in all ends securely
This fierce-but-cute crochet scorpion is a fantastic project that blends character and creativity with detailed shaping! Perfect for gifting or keeping as your own soft desert guardian. 🦂✨