Oh, the delightful world of amigurumi! 🌟 There’s something incredibly satisfying about taking a simple ball of yarn and transforming it into an adorable creature, like a starling, with just a bit of creativity and some nimble fingers. When I first stumbled upon the art of amigurumi, I was instantly charmed by the endless possibilities it offers. Crafting a starling, with its sleek shape and quirky personality, is like bringing a tiny piece of nature into your own hands. The way these creations spring to life, stitch by stitch, is nothing short of magical. As I embark on this crafty journey, I feel like an artist, painting with yarn instead of colors. 🎨
Creating an amigurumi starling pattern involves a delightful blend of imagination and technique. First, I gather my materials—soft yarn in hues of grey, black, and hints of iridescence to mimic that distinctive starling sheen. I start by crocheting the body, using simple shapes that slowly morph into the bird’s recognizable form. The wings and tail follow, each component adding to the bird’s graceful silhouette. As I crochet, I often find myself lost in the rhythm, each loop and hook a step closer to completion. Adding the finishing touches, like delicate embroidered eyes or a quirky little beak, truly brings the starling to life. It’s a joyful process, where each completed piece feels like a small triumph. ✨
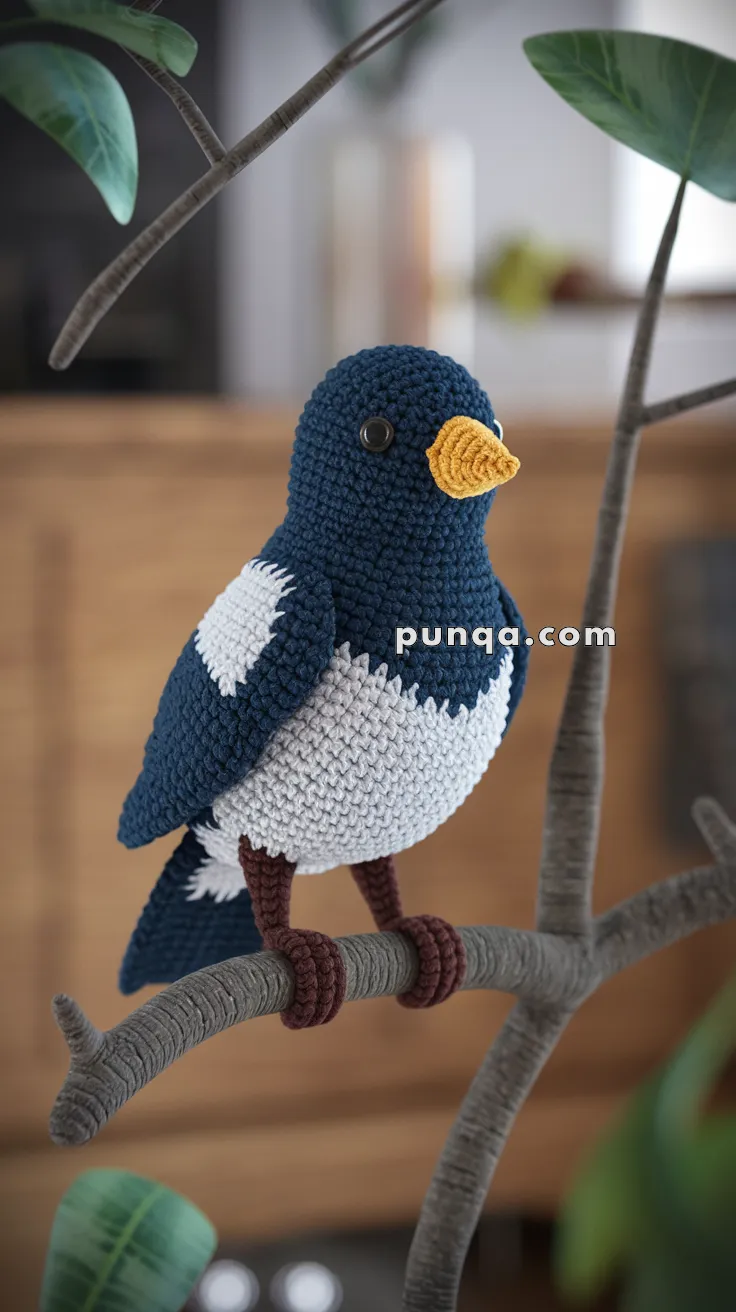
🐦 Starling Bird Amigurumi Crochet Pattern
Skill Level: Intermediate
Finished Size: ~8–9 inches (20–23 cm) tall
🧶 Materials
-
Worsted weight yarn in:
– Navy blue (body and wings)
– White (belly and wing detail)
– Yellow/golden (beak)
– Dark brown (legs and claws) -
10 mm safety eyes
-
Polyester fiberfill stuffing
-
3.0 mm or 3.5 mm crochet hook
-
Yarn needle
-
Stitch marker
-
Scissors
✨ Abbreviations (US Terms)
sc – single crochet
inc – increase (2 sc in same stitch)
dec – decrease (sc 2 stitches together)
ch – chain
sl st – slip stitch
MR – magic ring
🧵 Pattern Instructions
🧠 Head & Body (worked as one piece)
Start with navy blue yarn:
MR, 6 sc
inc x6 (12)
(1 sc, inc) x6 (18)
(2 sc, inc) x6 (24)
(3 sc, inc) x6 (30)
(4 sc, inc) x6 (36)
Rounds 7–12: sc around (36)
(4 sc, dec) x6 (30)
(3 sc, dec) x6 (24)
Switch to white yarn
(2 sc, dec) x6 (18)
(1 sc, dec) x6 (12)
– Stuff firmly
– dec x6 (6), close and fasten off
– Attach safety eyes between Rounds 8–9, spaced ~7 stitches apart
🧡 Beak
With yellow yarn:
MR, 4 sc
Round 2: (1 sc, inc) x2 (6)
Round 3: sc around (6)
– Fasten off, stuff lightly, and sew to front of face
🪽 Wings (Make 2)
With navy yarn:
MR, 6 sc
inc x6 (12)
(1 sc, inc) x6 (18)
Rounds 4–7: sc around (18)
Round 8: (1 sc, dec) x6 (12)
– Fasten off, flatten, and sew to sides of body
– Embroider or crochet white tips and feather details on top edge
🐓 Tail
With navy yarn:
Ch 5
Row 1: sc in 2nd ch from hook, sc across (4)
Rows 2–6: ch 1, turn, sc across (4)
– Fasten off and sew to rear of bird pointing downward
🦵 Legs & Claws (Make 2)
With brown yarn:
MR, 6 sc
Rounds 2–6: sc around (6)
– Do not stuff
– Position one leg on each side of base
– For claws, chain 6, sl st back and repeat 3 times, then sew to front of each leg to grip a branch or perch
🧷 Assembly
-
Sew beak to center face
-
Attach wings symmetrically on each side
-
Position and sew legs beneath body
-
Stitch tail at the rear
-
Add white patch details to wings if not done earlier
✨ Finishing Touches
-
Use embroidery floss to outline eyes for more detail
-
Add a few speckles of white or lighter blue yarn for realism
-
Lightly brush wing edges for a soft, feathery texture
-
Perch your bird on a small branch or add wire in legs for poseability
🎯 Tips
-
Use a stitch marker to keep track of your rounds
-
Keep stuffing light in wings and tail for natural shaping
-
Crochet tight for structure, especially in neck area
-
Adjust yarn shades for different bird species – try a robin or cardinal!