Bring a touch of handmade charm to your holiday décor with the Reindeer Face Ornaments, a crochet project that’s as sweet as it is festive! 🦌🎄🧶 These flat-style ornaments feature sleepy embroidered eyes, soft oval muzzles, and sturdy antlers, making them the perfect addition to your Christmas tree. Their polished look and whimsical details add warmth and personality to your holiday celebrations, while still being quick and fun to make.
With festive embellishments like bows and holly leaves, these ornaments are easy to customize and style to match your holiday theme. Whether you’re crafting a set for your own tree, gifting them to loved ones, or using them as cheerful accents around the home, the Reindeer Face Ornaments are a joyful way to crochet coziness, celebration, and a sprinkle of handmade magic—one loop at a time! 🧵✨🎁
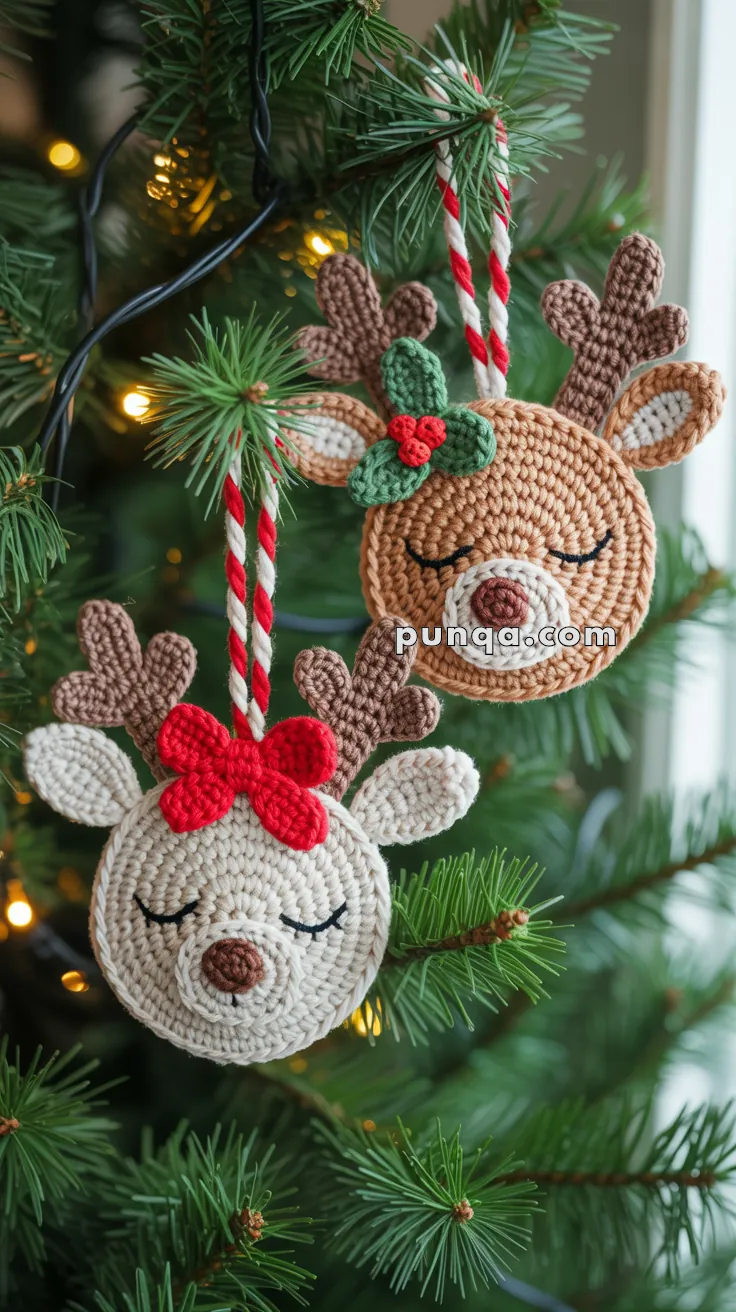
🦌 Crochet Reindeer Face Ornaments Pattern
These charming flat reindeer face ornaments bring a cozy, handmade touch to your Christmas décor. Designed to hang beautifully on a tree, each ornament features a softly rounded face, sleepy embroidered eyes, layered ears, sculpted antlers, and festive accents. The pattern includes two variations:
- 🎀 Cream Reindeer with Red Bow
- 🍃 Brown Reindeer with Holly Leaves and Berries
Both versions share the same base construction, with interchangeable decorations.
✨ Skill Level
Confident Beginner to Intermediate
You’ll work flat circles, small shaped pieces, embroidery, and layered assembly.
📏 Finished Size
Approximately 12–13 cm (4.75–5 in) tall and 10–11 cm (4–4.25 in) wide, excluding the hanging loop.
🧶 Materials
Yarn (worsted weight / aran):
- Cream or beige (cream reindeer face)
- Warm caramel or light brown (brown reindeer face)
- Dark brown (antlers, nose)
- White (muzzle)
- Light cream or beige (inner ears)
- Red (bow or berries)
- Green (holly leaves)
Notions:
- 3.0–3.5 mm crochet hook
- Tapestry needle
- Small amount of fiberfill (muzzle and nose only)
- Black embroidery thread or fine black yarn (eyes)
- Red-and-white twisted cord for hanging loop
🧵 Abbreviations (US Terms)
- MR – magic ring
- sc – single crochet
- inc – increase (2 sc in same stitch)
- dec – decrease (sc2tog)
- sl st – slip stitch
- ch – chain
- hdc – half double crochet
- FO – fasten off
🦌 Face Base (Flat Circle)
With cream or light brown yarn:
- R1: MR, 6 sc (6)
- R2: inc ×6 (12)
- R3: (sc, inc) ×6 (18)
- R4: (2 sc, inc) ×6 (24)
- R5: (3 sc, inc) ×6 (30)
- R6: (4 sc, inc) ×6 (36)
- R7: (5 sc, inc) ×6 (42)
- R8: (6 sc, inc) ×6 (48)
Sl st in next stitch, FO.
Do not stuff — this piece stays flat.
🐽 Muzzle
With white yarn:
- R1: MR, 6 sc (6)
- R2: sc around (6)
- R3: (sc, inc) ×3 (9)
FO, leaving a long tail.
Add a very small pinch of stuffing.
Sew the muzzle centered on the lower half of the face, shaping it slightly oval.
👃 Nose
With dark brown yarn:
- R1: MR, 6 sc (6)
- R2: sc around (6)
FO. Add a tiny amount of stuffing.
Sew centered at the top of the muzzle.
Optional: embroider a short vertical stitch under the nose for a subtle mouth.
👁 Sleepy Eyes
Using black embroidery thread:
- Embroider two gentle curved lines above the muzzle
- Keep the curves soft and symmetrical
- No eyelashes
👂 Ears (Make 2)
Inner Ear
With light cream yarn:
- MR, 4 sc (4)
- sc around (4)
FO.
Outer Ear
With face color yarn:
- MR, 5 sc (5)
- sc around (5)
FO.
Place inner ear on outer ear.
Sew together through both layers.
Attach ears low on the sides of the face, slightly behind the edge, angled outward.
🦌 Antlers (Make 2)
With dark brown yarn:
Antler Base
- MR, 6 sc (6)
- (sc, inc) ×3 (9)
- sc around (9)
Prongs
- Prong 1: ch 4, sc in 2nd ch and next 2 sts, sl st into base stitch
- Prong 2: skip 2 sts, ch 5, sc in 2nd ch and next 3 sts, sl st into base
- Prong 3: skip 2 sts, ch 4, sc in 2nd ch and next 2 sts, sl st into base
FO.
Sew antlers to the top back edge of the face, allowing them to fan outward naturally.
🎀 Red Bow (Cream Reindeer)
Make 4 petals with red yarn:
- R1: MR, 6 sc
- R2: (sc, inc) ×3 (9)
- R3: sc around (9)
- R4: (sc, dec) ×3 (6)
FO each petal.
Arrange petals in a cross shape.
Wrap yarn tightly around the center 3–4 times.
Secure and sew between the antlers.
🍃 Holly Leaves & Berries (Brown Reindeer)
Leaves (Make 2)
With green yarn:
- Ch 9
- Work along chain: sl st, sc, (hdc, ch 1, sl st), sc, (hdc, ch 1, sl st), sc, (hdc, ch 2, sl st), sc, sl st
- Turn and mirror stitches on opposite side
FO.
Berries (Make 3)
With red yarn:
- R1: MR, 6 sc (6)
- R2: inc ×6 (12)
- R3: dec ×6 (6)
Lightly stuff, close, FO.
Arrange berries in a cluster and sew to base of leaves.
Attach between antlers.
🎄 Hanging Loop
Use a red-and-white twisted cord.
To make your own:
- Twist one red and one white strand tightly
- Fold in half and allow to twist together
- Knot ends
Sew loop securely to the back top center of the ornament.
✨ Finishing
- Shape ears and antlers gently with fingers
- Keep the face flat
- Weave in all ends neatly on the back
- Light steam pressing may be used (do not flatten details)
🎁 Finished Reindeer Ornaments
Your reindeer ornaments are now ready to decorate the tree, top gift packages, or delight customers at holiday markets. With their calm expressions, festive details, and clean flat design, they’re timeless, cozy, and perfect for the season.
Happy crocheting and joyful holidays! 🎄🧶🦌


Thank you for the pattern. Its adorable.
Thank you for the pattern
Thankyou for sharing your pattern.
My grandchildren will love these.
Have a lovely holiday
Thank you for this cute pattern.
Happy Holidays