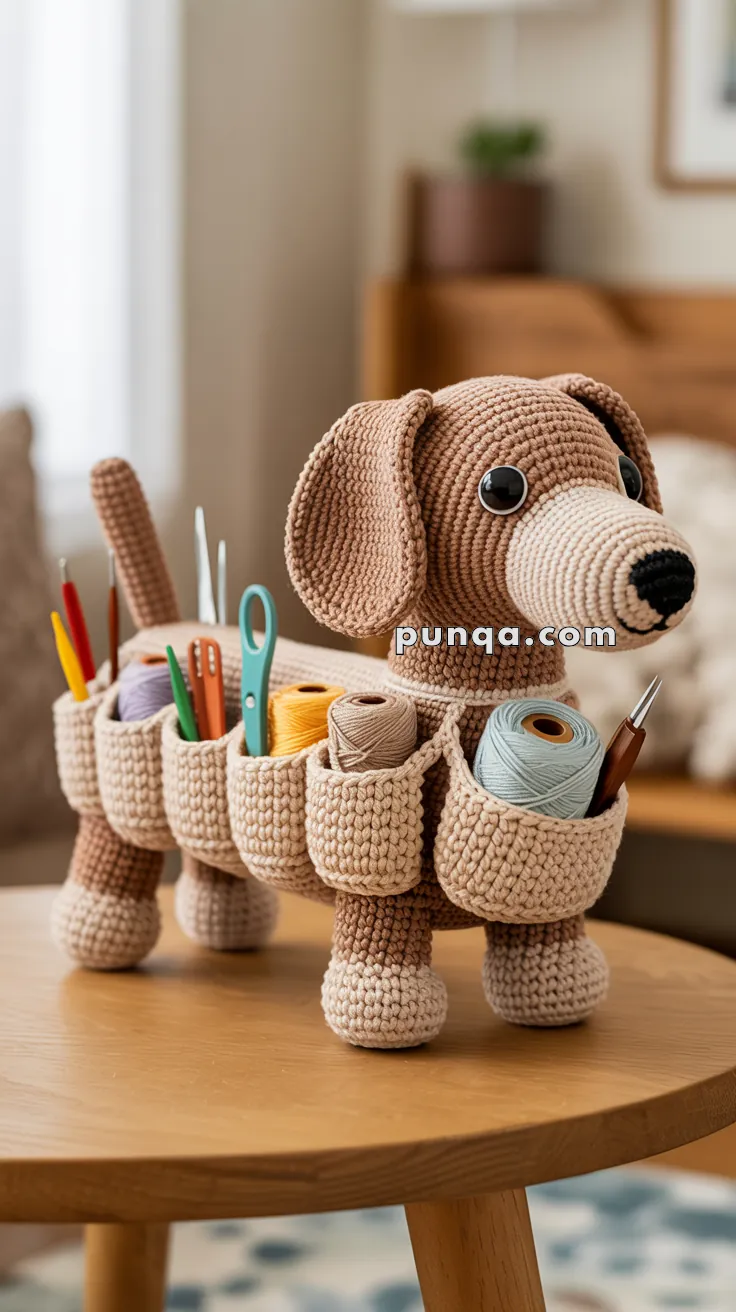
Say hello to the Amigurumi Dachshund Caddy, the cutest little helper to ever wag its way into your crafting space! 🐾🧶 With its long, lovable body, floppy ears, and sweet expression, this pup isn’t just adorable—it’s practical too. Designed to hold your crochet hooks, scissors, pens, or even a few treats, this dachshund brings both charm and organization to your desk or sewing nook.
Perfect for crocheters who love functional projects with personality, this pattern invites you to play with soft textures, earthy tones, and clever design details like saddle-style pockets or a tail that doubles as a loop holder. Whether you’re gifting it to a dog-loving friend or keeping it by your side during crafting sessions, the Amigurumi Dachshund Caddy is a delightful way to stitch up joy, utility, and a whole lot of handmade heart—one loop at a time! 🧵🐶
🧶 Amigurumi Dachshund Caddy Crochet Pattern
A long-bodied dachshund with floppy ears, stubby legs, a wagging tail, and rows of practical side pockets to hold your craft tools.
✨ Skill Level
Intermediate – shaping, cylindrical pocket construction, and firm structural stuffing.
📏 Finished Size
Approx. 31–33 cm long and 17–18 cm tall when made with sport/light-worsted cotton yarn and a 2.75–3.0 mm hook.
🧵 Materials
Yarn: Light Worsted / Sport Cotton
- Beige: paws, snout, pockets
- Warm Medium Brown: head, body, legs, ears, tail
- Black: nose embroidery
Tools
- 2.75–3.00 mm hook
- 20–22 mm round glossy safety eyes
- Polyfill stuffing
- Yarn needle, scissors, stitch markers
- Optional: narrow plastic canvas strip for body base support
🔑 Abbreviations (US Terms)
MR – magic ring
sc – single crochet
inc – increase (2 sc in same st)
dec – decrease (sc2tog)
ch – chain
sl st – slip stitch
BLO – back loop only
FO – fasten off
Snout (Beige)
(Long cylindrical muzzle as seen in photo)
- MR, 6 sc [6]
- inc x6 [12]
- (1 sc, inc) x6 [18]
- (2 sc, inc) x6 [24]
5–14) sc around [24] - (2 sc, dec) x6 [18]
16–17) sc around [18]
Stuff firmly to a smooth cylinder.
Embroider an oval black nose at the tip.
Head (Brown)
(Slightly oval head with broad forehead, eyes positioned low near snout)
- MR, 6 sc [6]
- inc x6 [12]
- (1 sc, inc) x6 [18]
- (2 sc, inc) x6 [24]
- (3 sc, inc) x6 [30]
- (4 sc, inc) x6 [36]
- (5 sc, inc) x6 [42]
8–15) sc around [42] - (5 sc, dec) x6 [36]
- (4 sc, dec) x6 [30]
- (3 sc, dec) x6 [24]
Stuff very firmly.
Attach snout low and centered to the face.
Eyes
Insert 20–22 mm safety eyes between rounds 8–9, only 3–4 stitches apart, placed close to the snout.
Ears (Make 2 – Brown)
(Wide drooping oval ear flaps)
Worked flat in rows
- ch 11
- Row: sc in 2nd ch from hook, sc across [10]
3–5) sc across [10] - inc, sc 8, inc [12]
7–17) sc across [12] - dec, sc 8, dec [10]
19–21) sc across [10] - dec, sc 6, dec [8]
23–24) sc across [8]
FO with long tail.
Shape gently and sew high on the sides of the head, starting just behind the eyes so they fall downward naturally.
Body (Brown)
(Long, thick, rounded torso long enough to hold five pockets per side)
- MR, 6 sc [6]
- inc x6 [12]
- (1 sc, inc) x6 [18]
- (2 sc, inc) x6 [24]
- (3 sc, inc) x6 [30]
- (4 sc, inc) x6 [36]
7–48) sc around [36] - (4 sc, dec) x6 [30]
- (3 sc, dec) x6 [24]
Stuff firmly and evenly.
Optional: insert a narrow strip of plastic canvas in the belly area before final stuffing to maintain a flat base.
Legs (Make 4 – Beige Paws, Brown Legs)
(Slim cylindrical legs with tall brown section and short beige paw)
Start with Beige (paw):
- MR, 6 sc [6]
- inc x6 [12]
- (1 sc, inc) x6 [18]
4–9) sc around [18]
Switch to Brown (leg):
- BLO sc around [18]
11–25) sc around [18] - (1 sc, dec) x6 [12]
- dec x6 [6]
FO.
Stuff legs firmly from paw to top.
Sew evenly spaced so all four feet touch the surface and balance the body.
Tail (Brown)
(Slim upright tail)
- MR, 8 sc [8]
2–22) sc around [8]
Lightly stuff and attach at a natural upward tilt.
Storage Pockets (Make 10 – Beige)
(Deep cylindrical pockets sized for hooks, scissors, and yarn spools)
- MR, 6 sc [6]
- (1 sc, inc) x3 [9]
- (2 sc, inc) x3 [12]
4–18) sc around [12] - sl st, FO.
Make 5 for each side.
Attachment:
- Sew pockets evenly spaced along both sides of the body
- Bases aligned in a straight line
- Openings slightly tilted outward
Ensure spacing is equal so all 5 sit cleanly along the body length.
Assembly
1. Head to Body
Attach the head low at the front of the body, keeping the snout facing forward and level.
2. Ears
Sew high and slightly behind eye line.
3. Legs
Position so the dachshund stands flat and stable.
4. Tail
Sew at the rear, angled gently upward.
5. Pockets
Stitch firmly so they do not sag.
Use small invisible anchoring stitches on the outer rim if carrying heavy tools.
🎨 Finishing Touches
- Add a tiny embroidered smile or eyebrows if desired.
- The pockets are sized to hold small craft tools, hooks, or thread spools.
- You can stiffen the base by inserting a piece of plastic canvas inside the belly before closing.
This dachshund caddy is not only an adorable addition to your craft space but also a truly practical one, keeping your favorite tools and yarns right where you need them. With its floppy ears, wagging tail, and handy side pockets, it’s sure to bring both organization and joy to your creative corner. 🐾✨


Receita maravilhosa bem explicadinho obrigada punqa
Amei de ❤️