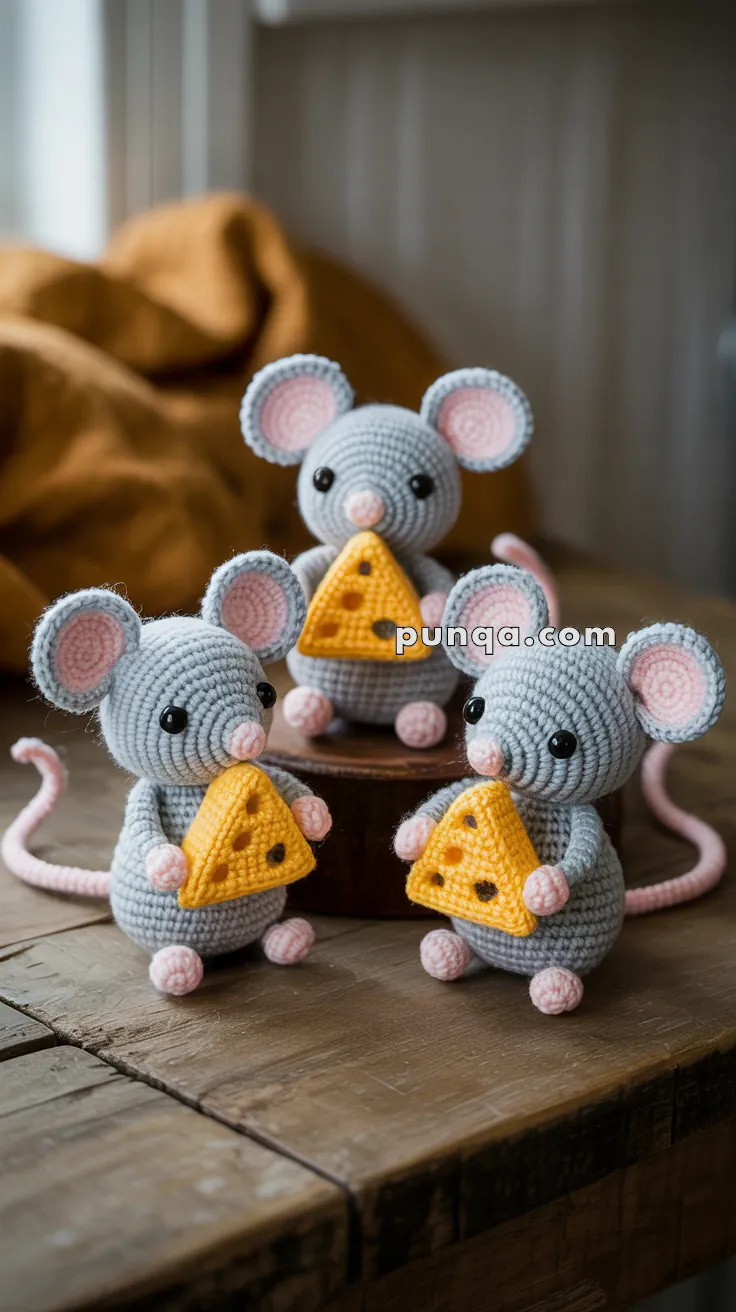
Get ready for a squeak-tacular adventure with the Amigurumi Mice with Cheese—a delightful crochet duo that’s bursting with charm and mischief! 🧀🐭 These tiny mice, with their twitchy noses, oversized ears, and playful personalities, are the perfect companions for a whimsical handmade scene. Paired with a wedge of holey cheese that doubles as a cozy playground, this pattern brings storytelling and snuggles together in the most adorable way.
Whether you’re crafting a mouse family, adding embroidered whiskers, or customizing your cheese with buttery yellows and fun textures, this project is full of creative possibilities. It’s a joyful make for all skill levels—quick to stitch, fun to personalize, and guaranteed to spark smiles. Whether perched on a shelf, tucked into a gift box, or starring in your next amigurumi photo shoot, the Mice with Cheese are ready to scamper into your heart—one stitch at a time! 🧶💛
🧀 Amigurumi Mice with Cheese Crochet Pattern
Bring a touch of cuteness (and a love for cheese!) into your home with these adorable crochet mice. With their oversized ears, long curly tails, and little stuffed cheese wedges, they make a delightful gift or decoration.
🧵 Skill Level
Intermediate – small parts, shaping, and precise assembly for clean proportions.
📏 Finished Size
- Height: 10–12 cm (4–4.7 inches)
- Tail length: 12–14 cm (4.7–5.5 inches)
🧶 Materials & Yarn Amount
For 3 mice with cheese:
- Light gray yarn: 90 g
- Soft pink yarn: 35 g
- Yellow yarn: 40 g
- Black yarn/thread: small amount
Other supplies:
- 2.25–2.75 mm hook
- 6–8 mm safety eyes (6 total)
- Polyester stuffing (~150 g)
- Yarn needle, stitch marker
✂️ Abbreviations
MR – magic ring
sc – single crochet
inc – increase
dec – invisible decrease
ch – chain
sl st – slip stitch
FO – fasten off
🐭 Body (Main Shape)
The body is larger and rounder than the head.
With gray yarn:
R1: MR, 6 (6)
R2: inc ×6 (12)
R3: (1 sc, inc) ×6 (18)
R4: (2 sc, inc) ×6 (24)
R5: (3 sc, inc) ×6 (30)
R6: (4 sc, inc) ×6 (36)
R7–12: sc around (36)
R13: (4 sc, dec) ×6 (30)
R14: (3 sc, dec) ×6 (24)
R15: sc around (24)
Stuff firmly, shaping a rounded lower belly.
R16: (2 sc, dec) ×6 (18)
R17: (1 sc, dec) ×6 (12)
R18: dec ×6 (6)
FO.
🐭 Head
Slightly smaller than the body and gently rounded.
With gray yarn:
R1: MR, 6 (6)
R2: inc ×6 (12)
R3: (1 sc, inc) ×6 (18)
R4: (2 sc, inc) ×6 (24)
R5: (3 sc, inc) ×6 (30)
R6–8: sc around (30)
Insert eyes between R6–7, about 6 stitches apart.
R9: (3 sc, dec) ×6 (24)
R10: (2 sc, dec) ×6 (18)
Stuff firmly.
R11: (1 sc, dec) ×6 (12)
R12: dec ×6 (6)
FO.
🐽 Nose
With pink yarn:
MR, 6 sc
1–2 rounds sc
FO and sew centered slightly below eye line.
👂 Ears (Make 2)
Large, round, slightly cupped.
Outer Ear (Gray)
MR, 6
inc ×6 (12)
(1 sc, inc) ×6 (18)
(2 sc, inc) ×6 (24)
FO.
Inner Ear (Pink)
MR, 6
inc ×6 (12)
(1 sc, inc) ×6 (18)
FO.
Sew pink inside gray. Slightly pinch bottom when attaching.
💪 Arms (Make 2)
Start pink:
MR, 6
sc around
Switch to gray:
sc 5–6 rounds
FO.
Light stuffing only at top.
🦶 Legs (Make 2)
Start pink:
MR, 6
inc ×6 (12)
sc around
Switch to gray:
(1 sc, dec) ×4 (8)
sc 2 rounds
FO.
Lightly flatten.
🐁 Tail
With pink yarn:
Ch 45–55
Sl st back along chain
FO.
Thin, flexible, and slightly curled.
🧀 Cheese Wedge (Make 3)
Triangle Panels (Make 2)
With yellow yarn:
Ch 9
Row 1: sc across (8)
Row 2: dec, sc 4, dec (6)
Row 3: dec, sc 2, dec (4)
Row 4: dec, dec (2)
Row 5: dec (1)
FO.
Side Strip
Ch 18–20
Sc across
FO.
Wrap strip around triangle edge, attach second triangle, stuff lightly, and close.
Cheese Holes
Use black yarn to embroider small irregular circles.
🧵 Assembly
- Sew head to body centered and upright
- Attach ears high and angled outward
- Sew arms slightly forward to hold cheese
- Attach legs low at front for sitting pose
- Sew tail at back and curve naturally
- Secure cheese between hands
✨ Final Shaping
- Keep body fuller than head
- Position ears symmetrically but slightly angled
- Curve tails differently for variation
- Keep expression minimal and soft
🐭🧀 Finished Look
You’ll create a trio of adorable mice with:
✔ Rounded, chubby bodies
✔ Smaller, balanced heads
✔ Oversized soft ears
✔ Tiny pink paws and long tails
✔ Neatly shaped cheese wedges
Perfect for display, gifting, or building a cute handmade collection 🐭🧀✨