Sweet, stripey, and full of holiday cheer, the Amigurumi Candy Cane is a festive treat you can crochet in no time! 🍭❤️ With its classic red-and-white twist and playful shape, this ornament brings instant Christmas charm to your tree, garlands, or gift toppers. Whether you’re decking the halls or crafting handmade surprises, this little candy cane is a joyful way to sprinkle some seasonal magic into your makes.
Perfect for beginners and seasoned stitchers alike, this pattern uses simple techniques to create a polished, bendable shape that holds its curve beautifully. Customize with different colors, add a tiny bell or bow, or stitch up a whole batch for a candy cane bouquet! It’s a quick, satisfying project that captures the whimsy of the holidays—one sweet stitch at a time. 🧶🎅
🍭 Amigurumi Candy Cane Crochet Pattern
Nothing says Christmas quite like the iconic red and white candy cane! This easy amigurumi crochet pattern creates adorable plush candy cane ornaments – perfect for decorating your Christmas tree, adding to gift wrapping, or making festive garlands.
This project works up quickly and uses simple stitches for that beautiful striped look! ✨
✨ Skill Level
Beginner to Intermediate – knowledge of color changes and working in the round required.
📏 Finished Size
Approximately 14-15 cm (5.5-6 in) tall
🧶 Materials
Yarn
- Red cotton yarn (DK or worsted weight) – approx. 12g (25m)
- White cotton yarn (DK or worsted weight) – approx. 12g (25m)
- Total: 24g yarn
Other Supplies
- Crochet hook 3.0 mm
- Polyester fiberfill stuffing
- Pipe cleaner or wire (optional, for shaping the curve)
- Yarn needle
- Scissors
- Stitch marker
🧵 Abbreviations (US Terms)
- MR – Magic Ring
- sc – Single Crochet
- inc – Increase (2 sc in same st)
- dec – Decrease (sc2tog)
- sl st – Slip Stitch
- st – Stitch
- FO – Fasten Off
Note: Worked in continuous rounds. Use a stitch marker to track rounds.
🍭 Pattern Instructions
Starting the Candy Cane
Using red yarn:
Round 1: MR, 6 sc (6)
Round 2: 6 inc (12)
Rounds 3-4: sc around (12)
Creating the Stripes
Switch to white yarn (change color by pulling new yarn through final loop of last stitch):
Rounds 5-6: sc around (12)
Switch to red yarn:
Rounds 7-8: sc around (12)
Switch to white yarn:
Rounds 9-10: sc around (12)
Switch to red yarn:
Rounds 11-12: sc around (12)
Switch to white yarn:
Rounds 13-14: sc around (12)
Switch to red yarn:
Rounds 15-16: sc around (12)
Switch to white yarn:
Rounds 17-18: sc around (12)
Switch to red yarn:
Rounds 19-20: sc around (12)
Switch to white yarn:
Rounds 21-22: sc around (12)
Switch to red yarn:
Rounds 23-24: sc around (12)
Begin stuffing firmly as you work.
Finishing the Top
Switch to white yarn:
Rounds 25-26: sc around (12)
Round 27: (sc, dec) x4 (8)
Round 28: 4 dec (4)
FO, leaving a long tail. Thread tail through remaining stitches and pull tight to close. Weave in end.
🎀 Assembly & Shaping
Adding Structure
- Insert pipe cleaner (optional): Thread a pipe cleaner or wire through the center of the stuffed tube before closing completely. This helps maintain the curved shape.
- Without wire option: Stuff very firmly and shape carefully by hand.
Creating the Hook Shape
- Gently bend the top 4-5 cm of the candy cane to form the classic hook shape.
- The curve should start after approximately the 5th or 6th stripe from the bottom (around where white meets red in the upper portion).
- Adjust curve as desired – make it more or less pronounced!
Final Touches
- Weave in all yarn ends securely.
- Optional: Add a hanging loop with matching yarn or ribbon attached to the curved part for ornaments.
- Give final shaping adjustments as needed.
🎄 Tips & Tricks
💡 Stripe changes: Carry the unused color up the inside of the work to avoid multiple yarn ends.
💡 Crisp stripes: Change colors in the last stitch of the round before the new color begins.
💡 Even stuffing: Stuff gradually as you work, not all at once at the end.
💡 Make a set: These work up quickly – make 6-8 for a beautiful garland!
💡 Size variations: Use thicker yarn and larger hook (4.0 mm) for bigger candy canes, or thinner yarn (sport weight + 2.5 mm hook) for mini versions.
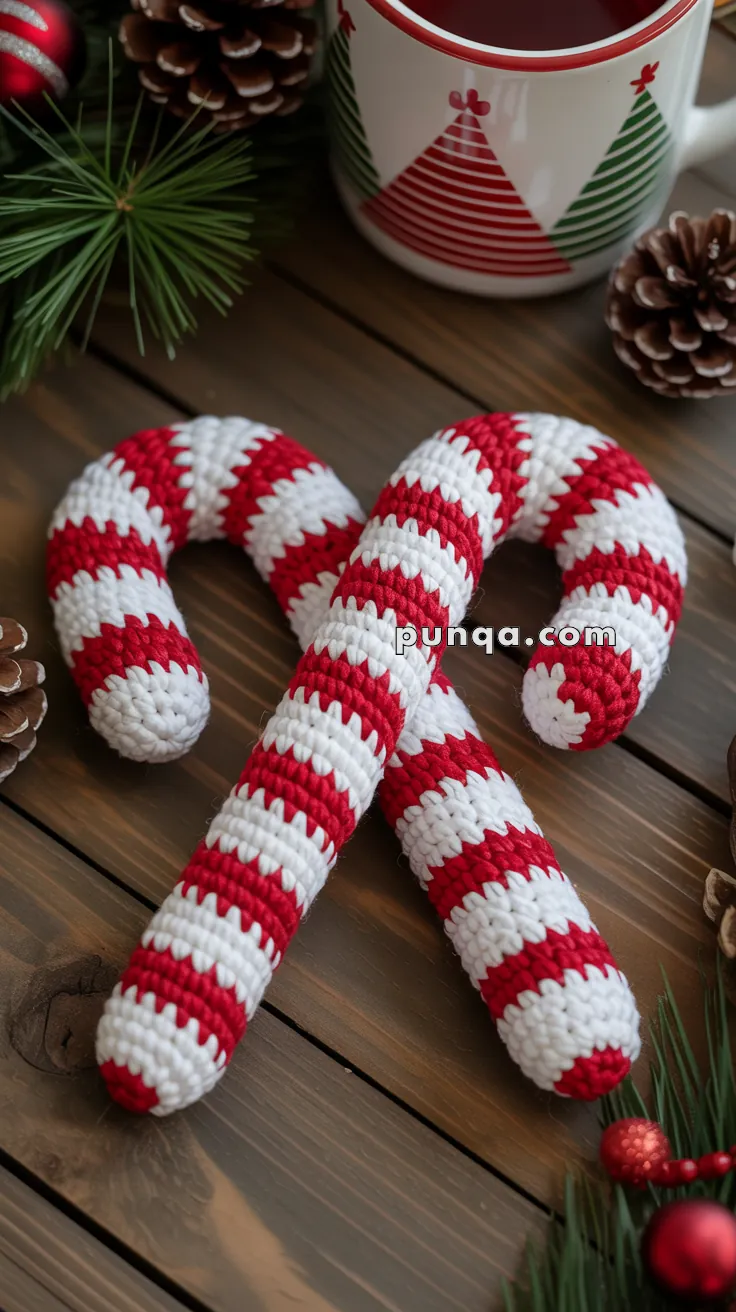
💡 Matching the photo: The candy canes in the image show 10 complete stripes (5 red, 5 white). This pattern creates exactly that!
🎁 Project Ideas
These festive candy canes are perfect for:
- 🎄 Christmas tree ornaments
- 🎁 Gift toppers & package decorations
- ✨ Holiday garlands
- 🧦 Stocking stuffers
- 🏠 Mantle or wreath decorations
- 🎀 Handmade gift sets
📸 Final Result
You now have an adorable handmade crochet candy cane perfect for spreading holiday cheer! The red and white stripes create that classic peppermint look, and the soft, huggable texture makes these special decorations you’ll treasure year after year.
Happy crocheting and Merry Christmas! 🎅🍭✨