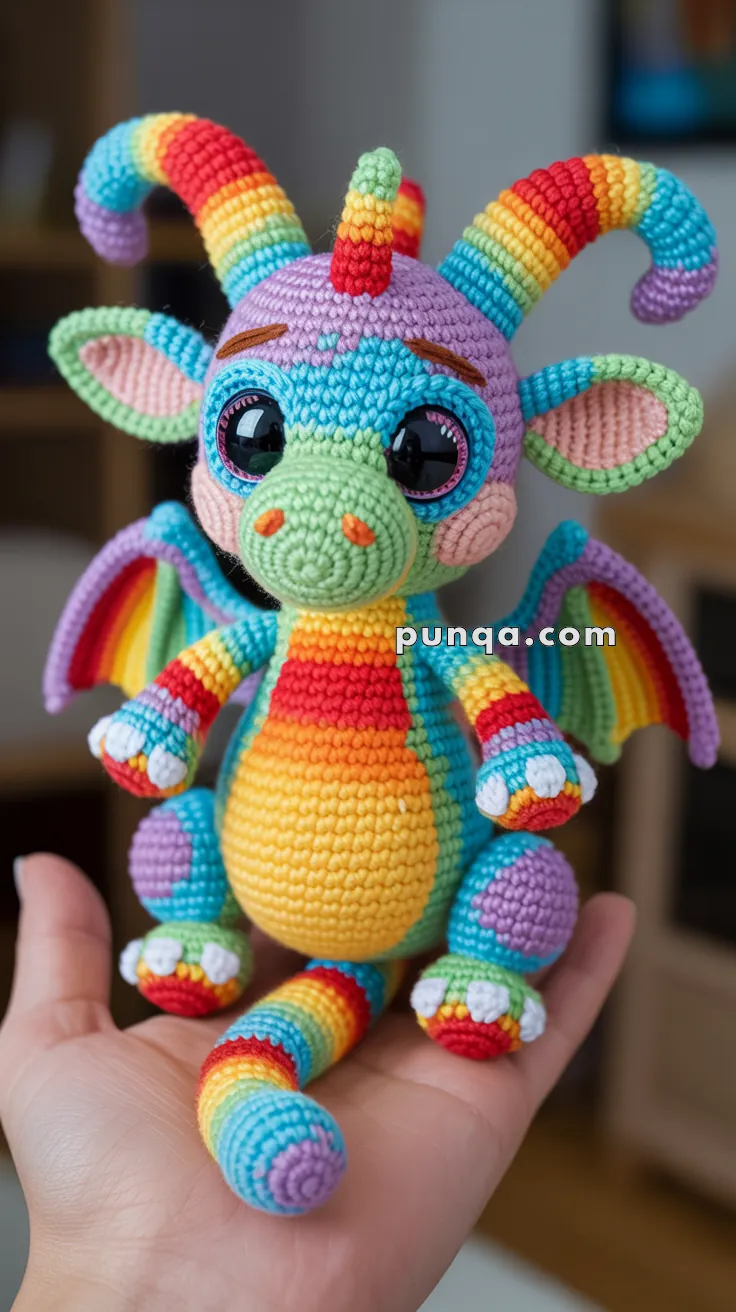
Add a splash of magic to your crochet collection with this Amigurumi Rainbow Baby Dragon pattern! With its chubby cheeks, tiny wings, and a dazzling array of colors, this mythical cutie is ready to charm its way into your heart. Whether you’re crafting for a fantasy fan, decorating a nursery, or simply indulging in a joyful project, this baby dragon brings whimsy and wonder to every stitch. 🧶🐉🌈
Designed for color lovers and dreamers alike, this pattern invites you to explore playful shaping, vibrant yarns, and fun extras like sparkly eyes, curly horns, or even a tiny treasure hoard. Customize your dragon with pastel hues for a soft look or go bold with fiery tones and glittery accents. Whether perched on a shelf, nestled in a gift basket, or starring in a handmade fairytale scene, this Rainbow Baby Dragon Amigurumi is a joyful and satisfying project—perfect for stitching up a little handmade enchantment, one loop at a time! 💖✨🪄
🐉 Amigurumi Rainbow Baby Dragon Crochet Pattern
This adorable rainbow baby dragon is bursting with color and charm, featuring big sparkling eyes, curly horns, and vibrant stripes from head to tail. Its whimsical wings and detailed claws make it a show-stopping piece for any amigurumi collection. Below is the full pattern with tips on color changes to achieve the vibrant rainbow look.
✨ Skill Level
Intermediate – This project involves multiple parts, frequent color changes, and assembling detailed components.
📏 Finished Size
Approximately 20–23 cm (8–9 in) tall when made with worsted/aran yarn and a 2.75–3.25 mm crochet hook.
🧶 Materials
Yarn (Worsted/Aran weight):
- Violet / Lavender – head crown, knee/elbow patches, tail tip
- Turquoise / Teal – head mask, arms/legs, wings edging
- Mint / Light Green – snout, face center, palms/soles
- Yellow – belly start, stripes
- Orange – belly middle, nostrils, stripes
- Red – belly top, stripes
- Blue – stripes
- White – eye whites, claws, wing inner rows
- Light Pink/Peach – cheeks, ear inner
- Brown – eyebrows
- Black – optional eye embroidery
Also needed:
- 2.75–3.25 mm crochet hook
- Safety eyes (16–20 mm)
- Tapestry needle, scissors, stitch markers
- Polyfill stuffing
- Optional: thin craft wire for shaping horns and wings
- Pins or clips for positioning parts
🧵 Abbreviations (US Terms)
MR – magic ring
sc – single crochet
inc – increase (2 sc in one stitch)
dec – invisible decrease
sl st – slip stitch
ch – chain
BLO/FLO – back/front loop only
hdc – half double crochet
dc – double crochet
tr – treble crochet
FO – fasten off
🎨 Color Change Tips
For clean color transitions, complete the last yarn-over of the current stitch using the new color. To avoid jogs when working in spirals, slip stitch into the first stitch of the new color and then sc in the same stitch to continue. For stripes, use 2 rounds per color, following the order: turquoise → green → yellow → orange → red → blue → violet, and repeat as necessary. Carry yarn along the inside if the color change is frequent, otherwise cut and weave ends.
Head
Begin with mint yarn.
Work a magic ring of 6 sc and increase evenly to 42 sts, shaping a sphere by crocheting multiple rounds without increases. Switch to turquoise for the mask section, then to lavender for the crown area. Insert safety eyes between rounds 9 and 10, spacing them approximately 11–12 stitches apart. Finish shaping by decreasing, stuffing firmly as you go, and closing the top.
Eyes and Snout
Create white crocheted eye whites (MR, increase to 18 sts), and turquoise eye rings to sew around the safety eyes. For the snout, crochet a mint oval (MR, increase to 24 sts), work a few rounds for depth, stuff lightly, and attach to the lower face. Add tiny orange nostrils. Pink cheek circles are made separately and sewn onto the sides of the snout area. Embroider brown eyebrows above the eyes for expression.
Curly Rainbow Horns
Crochet two striped tubes, 2 rounds per color, following the rainbow order. Each tube is approximately 13–14 cm long. Optionally insert wire to allow curling. Sew the horns to the top of the lavender crown area, curling them into spirals. Add a small green spike with an orange tip between the horns for extra detail.
Ears
Crochet two outer ear pieces in turquoise (flat rounds up to 24 sts) and two smaller pink inner pieces. Sew the inner pieces onto the outer pieces, then edge with mint green using single crochet. Fold the base slightly to create shape and sew behind the horns.
Body and Belly
The body is a turquoise tube starting with 6 sc in a magic ring, increased to 36 sts, and worked for several rounds. If desired, incorporate stripes using the rainbow sequence. The belly is a separate oval panel starting with yellow, switching to orange, and finally to red, changing colors every 4 rounds. Attach the belly panel to the front of the body.
Arms and Legs
Arms are striped following the rainbow sequence, with white claws sewn at the tips. Legs are similarly striped, with violet sole pads and three white claws each. Sew the arms to the upper body sides and the legs to the lower body for a seated position. Add violet patches to the knees.
Tail
The tail is a striped tube starting with violet for the tip, followed by blue, red, orange, yellow, green, and turquoise. Gradually decrease towards the end while lightly stuffing. Curve the tail slightly when sewing it to the back of the body.
Wings
Each wing consists of a turquoise frame crocheted in decreasing rows. A rainbow membrane is created by working rows of half double crochet in red, orange, yellow, green, blue, and violet, layered inside the frame. Edge the wing with lavender for contrast and sew to the upper back of the dragon.
Assembly
Sew the head onto the body, ensuring the belly panel is centered. Attach the snout, cheeks, eyes, and eyebrows. Position the horns and ears, sewing them securely. Add arms, legs, tail, and wings. Weave in all ends and adjust the stuffing as needed for balance and shape.
✨ Final Touches
Add white embroidery highlights to the eyes for extra sparkle. Lightly steam-block the wings to help them hold their shape. Adjust the horns into neat curls and ensure all parts are firmly attached. This dragon’s playful rainbow colors and adorable details will make it a standout in any collection.
This rainbow baby dragon is sure to bring joy and wonder to anyone who sees it! With its bright stripes and whimsical features, it’s perfect as a gift or a cheerful decor piece. Happy crocheting, and may your hooks always bring magic to life! 🧶🌈🐉