Snap into cuteness with this Amigurumi Mini Croc Keychain crochet pattern! With its tiny teeth, stubby legs, and playful grin, this little crocodile is ready to chomp its way into your heart—without any of the bite. Perfect for animal lovers, quirky gift-givers, or anyone who enjoys stitching up small, smile-worthy projects, this mini croc is a fun and fast way to add handmade charm to your keys, bags, or craft fair table. 🧶🐊🔑
Designed for personality and portability, this pattern invites you to play with bold greens, textured stitches, and fun extras like tiny eyes, a toothy smile, or even a mini bow tie for flair. Customize your croc with pastel hues for a whimsical twist or go classic with jungle tones and a cheeky expression. Whether it’s dangling from a backpack, tucked into a gift box, or guarding your crochet corner, this Mini Croc Keychain Amigurumi is a joyful and satisfying project—perfect for stitching up a little handmade snap, one loop at a time! 💖✨🌿
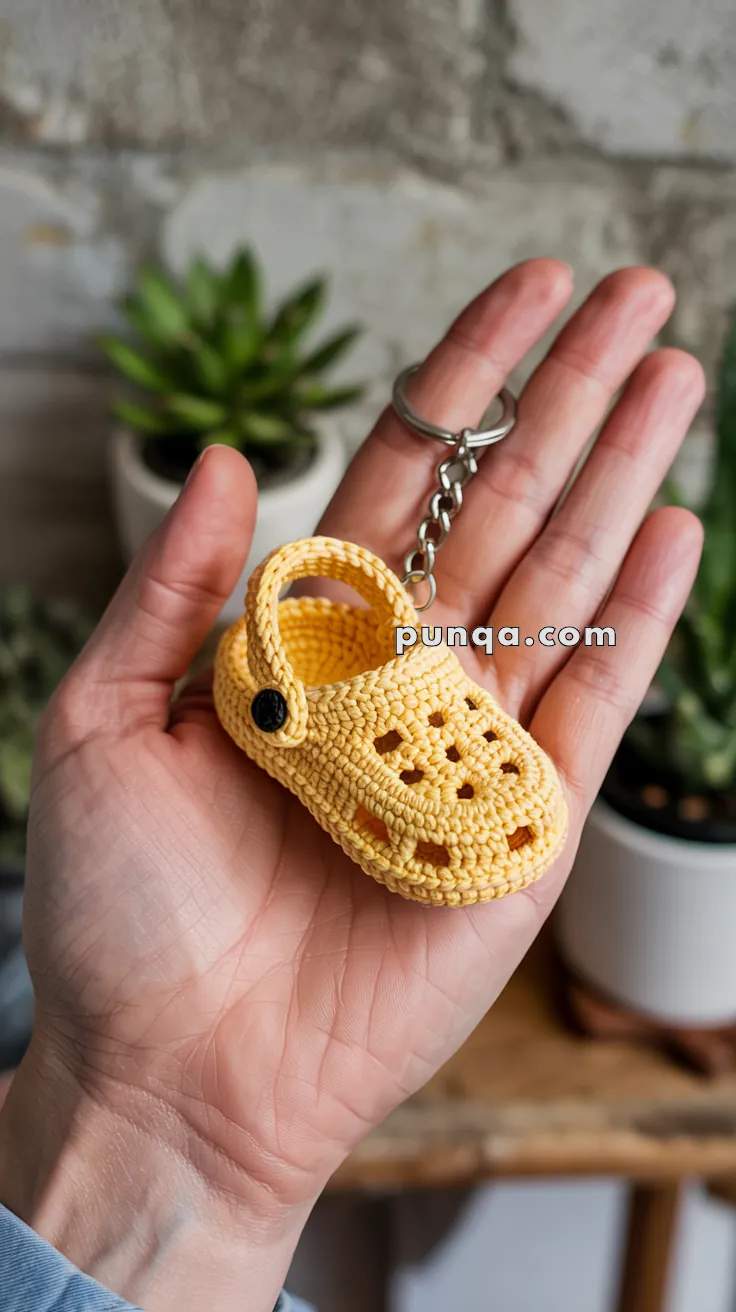
💛 Mini Crochet Clog Keychain Pattern
This delightful miniature crochet clog keychain captures the iconic comfort-shoe silhouette in precise detail. With its rounded toe, layered sole edge, structured sidewalls, perforated ventilation pattern, curved heel strap, and small button accent, this project produces a clean, realistic miniature that looks crisp from every angle. The hollow construction keeps the piece lightweight while preserving its sculpted shape, making it perfect for keys, bags, or handmade gifts.
✨ Skill Level
Intermediate
This pattern includes:
- realistic shoe shaping
- structured oval construction
- staggered ventilation placement
- heel tapering
- reinforced strap attachment
- symmetrical sculpting
📏 Finished Size
Using DK cotton yarn and a 2.0 mm hook:
- Length: approx. 7 cm
- Width: approx. 3.2 cm
- Height: approx. 3.5 cm
🧶 Materials & Yarn Amount
Yellow Cotton Yarn
Approx. 20–24 g
Black Cotton Yarn
Less than 1 g
Used for:
- strap rivet buttons
Supplies
- 2.0 mm crochet hook
- Yarn needle
- Stitch markers
- Strong sewing thread
- Metal keychain ring with chain
- Scissors
Do not use stuffing.
🔤 Abbreviations (US Terms)
- MR – magic ring
- sc – single crochet
- inc – increase
- dec – invisible decrease
- ch – chain
- sl st – slip stitch
- BLO – back loop only
- FO – fasten off
Work in continuous rounds unless stated otherwise.
👟 Sole Base
The sole is longer at the toe and narrower at the heel, creating the realistic clog silhouette.
Ch 14
Round 1
2 sc in 2nd ch from hook
11 sc
4 sc in last ch
Working opposite side:
11 sc
2 sc in last st
(30)
Round 2
inc
11 sc
inc x4
11 sc
inc x3
(38)
Round 3
(sc, inc) x3
11 sc
(sc, inc) x4
11 sc
(sc, inc) x3
(48)
The toe should now appear softly rounded and wider than the heel.
👣 Sole Ridge
Round 4 — BLO
sc around (48)
This creates the visible molded sole seam.
Round 5
sc around (48)
The sole should remain flat underneath with slightly lifted edges.
🧱 Shoe Walls
These rounds create the structured hollow upper.
Use tight tension to keep the walls firm.
Round 6
sc around (48)
Round 7
sc around (48)
Round 8
sc around (48)
The piece should now resemble a shallow shoe bowl.
🕳 Lower Side Openings
These rectangular side cutouts sit low along the shoe walls.
Keep them symmetrical.
Round 9
8 sc
(ch 1, skip 1, sc 1) x3
16 sc
(ch 1, skip 1, sc 1) x3
8 sc
(48)
Round 10
sc around, placing:
- 1 sc into each chain space
- regular sc elsewhere
(48)
The openings should appear clean and evenly aligned on both sides.
🕳 Top Ventilation Holes
The toe ventilation follows a staggered centered arrangement exactly like a real molded clog.
Round 11
15 sc
(ch 1, skip 1, sc 1) x5
23 sc
(48)
Round 12
sc around (48)
Round 13
17 sc
(ch 1, skip 1, sc 1) x4
23 sc
(48)
Round 14
sc around (48)
Round 15
19 sc
(ch 1, skip 1, sc 1) x3
23 sc
(48)
Round 16
sc around (48)
The holes should form:
- one front centered row
- two staggered rows behind
- evenly spaced toe perforations
👣 Heel Cup Shaping
The back gradually narrows into a realistic curved heel.
Round 17
13 sc
dec x3
16 sc
dec x3
13 sc
(42)
Round 18
sc around (42)
Round 19
12 sc
dec x2
14 sc
dec x2
12 sc
(38)
Round 20
sc around (38)
Round 21
11 sc
dec x2
12 sc
dec x2
9 sc
(34)
Round 22
sc around (34)
Round 23
10 sc
dec x2
10 sc
dec x2
8 sc
(30)
Round 24
sc around (30)
FO neatly.
The heel opening should remain rounded and structured rather than collapsing inward.
🔁 Heel Strap
The strap sits slightly forward from the heel edge and curves upward naturally.
Ch 24
Row 1
sc in 2nd ch from hook and across
(23)
Row 2
ch 1, turn
sl st across
FO leaving long tails.
The finished strap should:
- remain narrow
- curve softly
- arch above the heel opening
🔘 Strap Buttons (Make 2)
With black yarn:
R1
MR 6
sl st to first st
FO.
Flatten lightly.
Sew one button over each strap attachment point.
🔗 Keychain Attachment
Attach the metal keychain ring:
- through the heel strap
OR - through one strap side attachment
Use strong sewing thread instead of yarn for durability.
Wrap securely through the stitches multiple times.
✨ Final Shaping
Toe Dome
Push gently upward from inside to form the rounded clog front.
Sole
Press flat against a table so the shoe stands naturally.
Sidewalls
Curve inward slightly toward the heel.
Vent Holes
Open gently with fingers or tapestry needle for clean definition.
Strap
Allow it to arch naturally instead of lying flat.
💡 Important Notes for Photo Accuracy
To achieve the realistic miniature shape:
- use tight stitches
- avoid overstuffing (the shoe stays hollow)
- keep toe wider than heel
- maintain symmetrical hole spacing
- preserve the visible sole ridge
- shape gradually with fingers while working
The shoe should resemble a molded miniature clog rather than a slipper.
🌟 Finished Mini Clog
Your finished miniature crochet clog features:
- realistic rounded proportions
- layered molded sole
- hollow interior
- curved sidewalls
- structured heel cup
- symmetrical side openings
- staggered toe ventilation holes
- curved pivoting heel strap
- tiny rivet buttons
- balanced shape from every angle
This tiny crochet shoe makes a charming keychain, bag charm, nursery accessory, or handmade gift while maintaining a crisp, realistic silhouette in miniature form. 💛👟✨


These are so cute….