Welcome to the sweet and celebratory world of amigurumi! 🎂✨ Today, I’m excited to share my free crochet pattern for an Amigurumi Birthday Cake—a delightful and festive creation perfect for party lovers, gift-givers, or anyone who enjoys crafting cheerful and decorative plush designs! 🧶 Whether you love stitching up adorable treats, experimenting with textured frosting, or simply want to add a joyful birthday cake to your handmade lineup, this pattern will guide you through crafting a beautifully sculpted plush with layered tiers, colorful sprinkles, and a touch of celebratory charm! 🎉
This design embraces vibrant hues, rounded shaping, and playful details to bring a fun and heartwarming presence to your crochet projects! 🧶✨ I’ve carefully outlined each step to ensure your Amigurumi Birthday Cake turns out just right—ready to brighten up your space or become a treasured handmade gift! 🎁 So grab your hooks, pick out pastel pinks, sunny yellows, and rich creams, and let’s stitch up a delightful birthday cake! 🎂
🎂 Amigurumi Birthday Cake Crochet Pattern
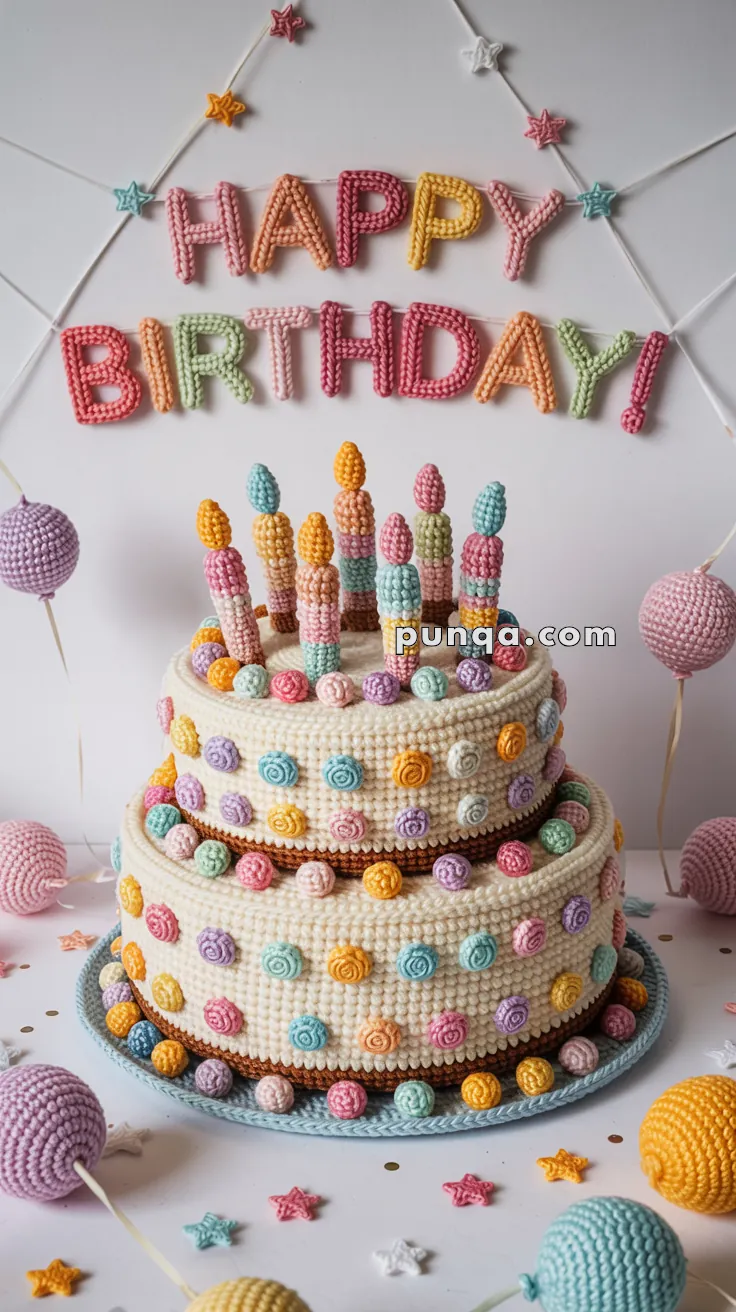
Make every celebration sweeter with this delightful crochet birthday cake display! This final version perfectly matches the photo — a cream-colored two-tier cake covered in pastel rosette dots, topped with tall spiral candles, and paired with a soft “HAPPY BIRTHDAY!” crochet banner in cheerful colors.
🧵 Skill Level
Intermediate – includes shaping, joining, colorwork, and embellishment.
📏 Finished Size
Approx. 25 cm (10 in) tall (including candles)
Base width: about 20 cm (8 in)
🧶 Materials
Worsted or light worsted weight yarn in pastel colors:
- Cream / off-white – cake body
- Brown – frosting divider lines
- Pastel yellow, pink, blue, mint, lavender, peach, orange – rosettes, candles, and banner letters
- Light blue – base plate
Other supplies:
- 3.0 mm crochet hook
- Fiberfill stuffing
- Yarn needle
- Stitch marker
- Optional: cardboard or plastic circle for base stability
✨ Abbreviations (US Terms)
MR – magic ring
sc – single crochet
inc – increase (2 sc in same stitch)
dec – decrease (sc 2 together)
ch – chain
sl st – slip stitch
BLO – back loop only
FO – fasten off
🍰 Cake Construction
🟤 Bottom Tier (Larger Layer)
With cream yarn:
R1 – MR, 6 sc (6)
R2 – inc × 6 (12)
R3 – (sc, inc) × 6 (18)
R4 – (2 sc, inc) × 6 (24)
R5 – (3 sc, inc) × 6 (30)
R6 – (4 sc, inc) × 6 (36)
R7 – (5 sc, inc) × 6 (42)
R8 – (6 sc, inc) × 6 (48)
R9 – (7 sc, inc) × 6 (54)
R10 – (8 sc, inc) × 6 (60)
R11 – (9 sc, inc) × 6 (66)
R12 – (10 sc, inc) × 6 (72)
R13 – (11 sc, inc) × 6 (78)
R14 – (12 sc, inc) × 6 (84)
R15–R20 – sc around (84)
R21 – BLO sc around (84) ← creates edge ridge
R22–R28 – sc around (84)
FO and stuff well for firm shape.
Join brown yarn at Round 14 ridge and sl st around for a visible frosting line.
🟤 Top Tier (Smaller Layer)
With cream yarn:
R1 – MR, 6 sc (6)
R2 – inc × 6 (12)
R3 – (sc, inc) × 6 (18)
R4 – (2 sc, inc) × 6 (24)
R5 – (3 sc, inc) × 6 (30)
R6 – (4 sc, inc) × 6 (36)
R7 – (5 sc, inc) × 6 (42)
R8 – (6 sc, inc) × 6 (48)
R9 – (7 sc, inc) × 6 (54)
R10 – (8 sc, inc) × 6 (60)
R11–R16 – sc around (60)
R17 – BLO sc around (60)
R18–R22 – sc around (60)
Join brown yarn at Round 10 ridge and sl st around for frosting divider.
Stuff firmly and FO.
Sew the smaller tier centered on top of the larger one.
🕯️ Candles (Make 12)
Each candle is tall and slightly textured, with pastel color stripes and yellow flames.
Candle Base (striped):
Using two alternating pastel colors:
R1 – MR, 6 sc (6)
R2–R12 – alternate colors every 2 rounds for stripes (6 sc each round)
FO and stuff lightly.
Flame:
With yellow yarn:
R1 – MR, 5 sc (5)
R2 – (sc, inc) × 2, sc (7)
R3 – (sc, dec) × 2, sc (5)
R4 – dec × 2, sc (3)
FO and sew to top of candle.
Attach candles evenly spaced around top tier.
🍭 Rosette Dots (Make 40–45)
Use pastel colors to create uniform rosettes for both tiers.
R1 – ch 12
In 2nd ch from hook: (sc, hdc) in each stitch across.
FO and coil into a spiral, sewing base as you shape it.
Attach evenly around cake sides and along bottom edges of both tiers.
Each tier should have alternating colors (pink, mint, yellow, lavender, blue, peach).
🍩 Cake Plate (Light Blue)
With light blue yarn:
R1 – MR, 6 sc (6)
R2 – inc × 6 (12)
R3 – (sc, inc) × 6 (18)
Continue increasing until piece measures slightly larger than bottom tier base (about 90–96 stitches).
R15 – sc around through BLO for edge ridge.
R16–R17 – sc around to form a shallow plate edge.
FO and sew cake onto plate center.
🔠 HAPPY BIRTHDAY Banner
Create plush pastel letters, each stuffed lightly for a soft 3D look.
Each letter measures approx. 7–9 cm tall.
Letter Base (Generic Construction)
- Chain the base length (5–10 ch depending on letter).
- Work rows of sc, increasing or decreasing to shape.
- Make two identical pieces per letter.
- sc around both layers together, lightly stuffing as you close.
- Use color sequence shown:
- H – pink
- A – orange
- P – red
- P – pink
- Y – yellow
- B – green
- I – pink
- R – orange
- T – peach
- H – pink
- D – yellow
- A – green
- Y – pink
- ! – red
Attach letters onto a string using invisible thread or matching yarn, spacing evenly.
🌟 Assembly
- Place top tier centered over bottom tier and sew securely.
- Evenly space 12 candles on the top tier.
- Attach rosettes around both layers and along brown frosting ridges.
- Position cake on the blue crochet plate.
- Hang “HAPPY BIRTHDAY!” banner above the cake using yarn loops or clips.
- Optional: add small crochet stars or balloons around for decoration.
🎉 Finishing Touch
Your crochet celebration cake is ready! With pastel rosettes, neat stripe candles, and cheerful letters, this two-tier showpiece brings handmade happiness to any birthday setup — no calories, just pure crochet joy!