Welcome to the mischievous and magical world of amigurumi! 🧙♂️✨ Today, I’m excited to share my free crochet pattern for an Amigurumi Goblin Face Keychain—a quirky and expressive creation perfect for fantasy lovers, RPG enthusiasts, or anyone who enjoys crafting unique and character-driven plush designs! 🧶 Whether you love stitching up legendary creatures, creating textured and lifelike figures, or simply want to add a goblin’s mischievous charm to your handmade lineup, this pattern will guide you through crafting a beautifully sculpted plush with big, expressive eyes, pointy ears, and a playful grin! 💚
This design embraces bold features, rich colors, and intricate details to bring a fun and whimsical presence to your crochet projects! 🧶✨ I’ve carefully outlined each step to ensure your Amigurumi Goblin Face Keychain turns out just right—ready to guard your keys or become a treasured handmade gift! 🎁 So grab your hooks, pick out deep greens, earthy browns, or mystical purples, and let’s stitch up a goblin with personality! 🧙♂️
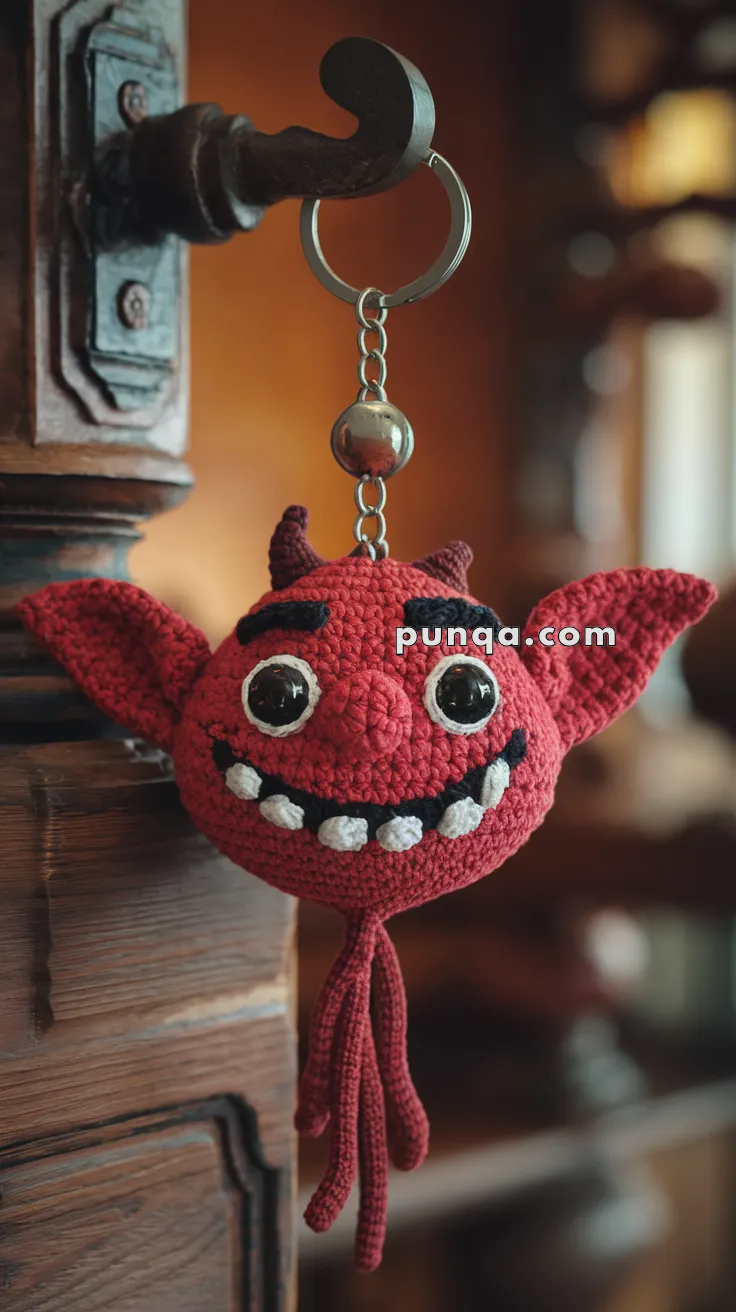
😈 Goblin Face Keychain Crochet Pattern
This mischievous goblin keychain features a wide grin, oversized wing-shaped ears, glossy eyes, curved horns, and dangling tentacles for extra personality. Its expressive features and plush texture make it a fun accessory for bags, keys, or gifts.
✨ Skill Level
Intermediate – includes shaping, appliqué, embroidery, and structural placement.
📏 Finished Size
Head: approx. 10–12 cm wide
Full length with tentacles: approx. 18–20 cm
🧶 Materials
• Chunky cotton or velvet-texture yarn – deep red
• DK or sport yarn – white (teeth), black (mouth, eyebrows)
• 12–14 mm glossy black safety eyes
• Fiberfill
• Keyring + jump ring
• Strong thread (nylon or embroidery thread) for attachment
• 3.0–3.5 mm hook for head
• 2.5 mm hook for details
• Tapestry needle
🧵 Abbreviations
MR – magic ring
sc – single crochet
inc – increase
dec – decrease
sl st – slip stitch
BOB – bobble stitch (5 dc bobble)
FO – fasten off
🔴 Head (Red)
Round 1: MR, 6 sc
Round 2: inc × 6 (12)
Round 3: (1 sc, inc) × 6 (18)
Round 4: (2 sc, inc) × 6 (24)
Round 5: (3 sc, inc) × 6 (30)
Round 6: (4 sc, inc) × 6 (36)
Rounds 7–15: sc around (36)
Rounds 16–17: sc around (36) to create the slightly wider profile
• Insert eyes between rounds 11–12, spaced wide apart
• Add small white crescent underlays (see next section)
• Begin stuffing firmly
Round 18: (4 sc, dec) × 6 (30)
Round 19: (3 sc, dec) × 6 (24)
Round 20: (2 sc, dec) × 6 (18)
Round 21: (1 sc, dec) × 6 (12)
Round 22: dec × 6 (6)
FO and close.
👀 Eye White Underlays (White – Make 2)
These are small crescents, not circles.
Ch 5
Row 1: sc 4
Row 2: sc 3
FO and curve slightly.
Sew under each eye.
👃 Textured Nose (Red)
Round 1: MR, 6 sc
Round 2: BOBBLE in each stitch (6 bobbles)
Round 3: sc around
Round 4: (1 sc, dec) × 2 (4)
Lightly stuff.
Sew between the eyes.
🦷 Teeth (White – Make 8)
Round 1: MR, 5 sc
Round 2: sc around (5)
Stuff very lightly.
Sew four teeth on each side of the smile.
🖤 Smile Line (Black)
Using black yarn:
Embroider a wide curved “U” smile.
Ensure deep indentation by pulling yarn slightly tight.
Attach teeth along upper curve.
🟫 Eyebrows (Black – Make 2)
Round eyebrows, slightly stuffed.
Round 1: MR, 6 sc
Round 2: (2 sc, inc) × 2 (8)
Round 3: sc around
FO and flatten slightly.
Sew angled downward for expression.
🔺 Horns (Red – Make 2)
Round 1: MR, 4 sc
Round 2: (1 sc, inc) × 2 (6)
Rounds 3–4: sc around
Round 5: dec, 4 sc (5)
Minimal stuffing.
Sew toward the top/back, slightly angled inward.
👂 Large Goblin Ears (Red – Make 2)
Wing-shaped, thin, forward-curving.
Round 1: MR, 6 sc
Round 2: (1 sc, inc) × 3 (9)
Round 3: (2 sc, inc) × 3 (12)
Round 4: (3 sc, inc) × 3 (15)
Round 5: (4 sc, inc) × 3 (18)
Round 6: sc around (18)
Round 7: (4 sc, dec) × 3 (15)
Round 8: (3 sc, dec) × 3 (12)
Do not stuff.
Flatten and pinch the bottom to curve shape forward.
Sew low and wide on the head.
🧵 Tentacle Strands (Red – Make 4)
These are thicker than simple chains.
Ch 20
Row 1: sc in each ch (19)
Row 2: sl st down the entire row for texture
FO.
Sew securely to the bottom center of the head.
🪝 Keychain Attachment
Do not crochet a loop.
Inside top of head:
• Thread strong nylon/embroidery thread through the stuffing
• Create a reinforced loop
• Attach the jump ring to the loop
• Connect keyring and metal bead if desired
Ensure reinforcement so the plush does not tear.
✂️ Finishing Touches
Shape ears outward with your fingers
Curve horns slightly inward
Tighten smile to create indentation
Arrange teeth evenly
Fluff tentacles for a natural hang
This amigurumi goblin face keychain is a hilarious way to show off your personality. Mischievous, handmade, and full of charm! 🗝️💀