Waddle into whimsy with the Amigurumi Pigeon—a charming little city dweller that’s ready to coo its way into your heart! 🐦🧶 With its plump body, gentle eyes, and signature neck fluff, this crochet cutie captures all the quirky charm of the beloved urban bird. Whether you’re a birdwatcher, a fan of Mo Willems’ iconic character, or just love crafting unexpected animals, this pigeon is a delightful addition to your amigurumi flock.
Perfect for customizing with soft greys, bold blues, or even a splash of iridescent yarn, your pigeon can be as realistic or playful as you like. Add tiny feet, a satchel, or a cheeky expression to give it personality, and you’ve got a feathered friend that’s ready to perch on your shelf or fly into someone’s gift box. Quick to stitch and full of character, the Amigurumi Pigeon is a joyful project that celebrates the everyday magic of handmade creatures—one loop at a time! 🧵💙
🕊️ Realistic Amigurumi Pigeon Crochet Pattern
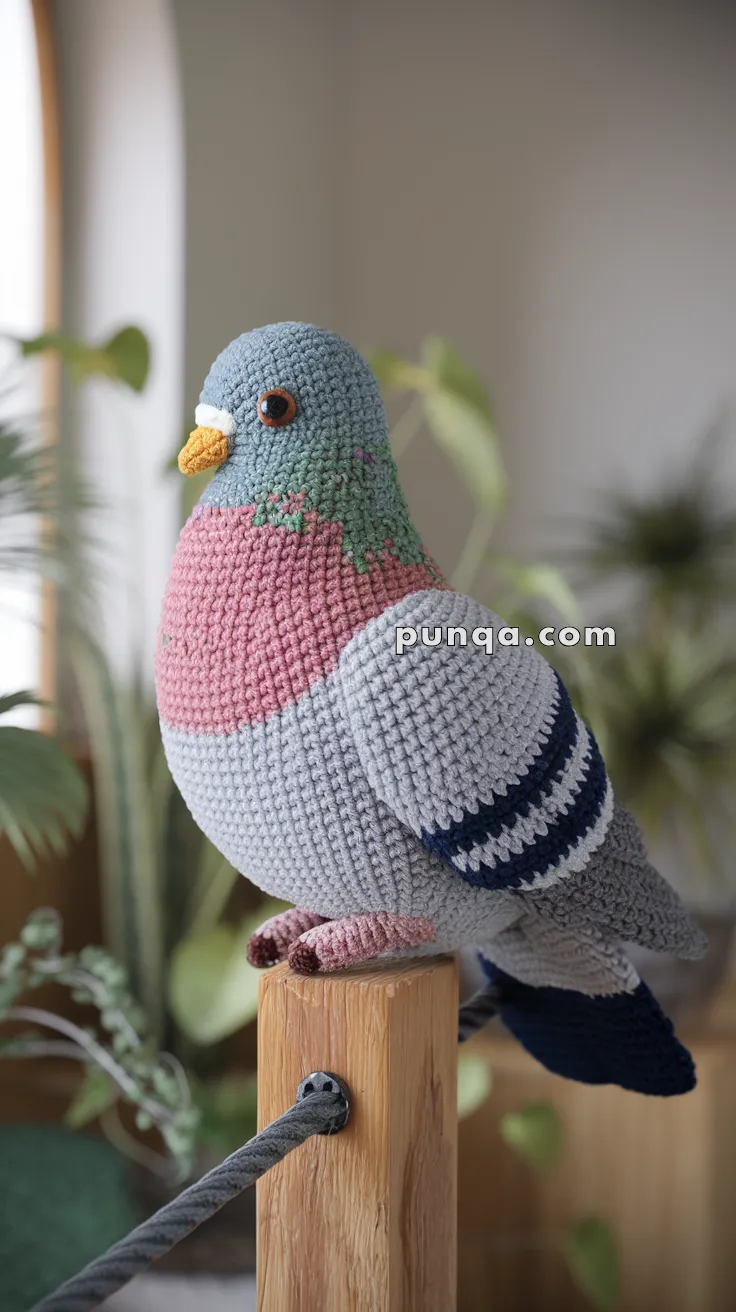
Bring a touch of gentle urban charm into your home with this beautifully detailed pigeon amigurumi! Made with soft greys, dusty pinks, deep navy stripes, and iridescent neck tones, this project captures the iconic beauty of city pigeons with sculpted shaping, subtle colorwork, and lifelike proportions. Whether perched on a shelf or displayed on a wooden post as in the photo, this pigeon feels delightfully real and full of sweet personality. 💚🪶
✨ Skill Level
Intermediate — Includes shaping, color transitions, and structural placement for wings, tail, and neck patterning.
📏 Finished Size
Approx. 20–22 cm (8–9 in) tall using DK yarn and a 2.5–3.0 mm hook.
🧶 Materials
-
DK / Sport weight yarn
-
Blue-grey (head)
-
Muted green/teal (neck mottling)
-
Dusty pink (upper chest and feet)
-
Pale grey (body, wing base)
-
White (neck patch)
-
Dark navy (wing stripes & underside tail shading)
-
Mustard-yellow (beak)
-
Brown (eye ring & foot claws)
-
-
2.5–3.0 mm crochet hook
-
8–10 mm safety eyes (black with brown embroidered ring)
-
Polyester stuffing
-
Tapestry needle
-
Stitch marker
-
Scissors
🪡 Abbreviations (US Terms)
MR — Magic Ring
sc — Single Crochet
inc — Increase
dec — Invisible Decrease
ch — Chain
sl st — Slip Stitch
st — Stitch
FO — Fasten Off
🪶 Head & Body (Worked Top-Down)
The head and body are made in one continuous piece following the photographed color progression:
Blue-grey → mottled green → pink upper chest → full pink chest → pale grey lower body
Start with blue-grey
R1: MR 6 (6)
R2: inc ×6 (12)
R3: (sc, inc) ×6 (18)
R4: (2 sc, inc) ×6 (24)
R5: (3 sc, inc) ×6 (30)
R6: (4 sc, inc) ×6 (36)
R7: (5 sc, inc) ×6 (42)
R8–R14: sc around (42)
➤ Insert eyes between R9–R10, spaced 6–7 sts apart
➤ Embroider thin brown eye-ring as in the photo
🟢 Mottled Iridescent Neck
Switch to muted green
R15–R18: sc around (42)
During R17–R18
-
randomly replace 3–6 front-center stitches with dusty pink
-
keep color dashes subtle and scattered
This reproduces the photographed iridescent transition.
🤍 White Neck Patch
Switch to white
R19: sc around (42), but ONLY across the front 10–12 sts
This stripe sits at the upper edge of the pink zone, not above the green.
🌸 Pink Chest
Switch to dusty pink
R20–R27: sc around (42)
During R20–21, add 6–10 green stitches at the top center to finish the mottled fade.
The chest should look full, rounded, and soft.
🩶 Lower Body (Pale Grey)
Switch to pale grey
R28: (5 sc, dec) ×6 (36)
R29–31: sc around (36)
R32: (4 sc, dec) ×6 (30)
R33–34: sc around (30)
R35: (3 sc, dec) ×6 (24)
R36–37: sc around (24)
R38: (2 sc, dec) ×6 (18)
R39: (sc, dec) ×6 (12) — stuff firmly
R40: dec ×6 (6)
FO and close.
The final silhouette should match the photo’s wide chest and softly narrowing belly.
🟡 Beak
Mustard-yellow
R1: MR 5 (5)
R2: (sc, inc) ×5 (10)
R3: sc around (10)
R4: (3 sc, dec) ×2 (8)
R5: (2 sc, dec) ×2 (6)
FO, stuff lightly.
Sew centered under the eyes.
Shape slightly oval.
Add a tiny embroidered white ridge at the top.
👁️ Eye Detail
Use black safety eyes.
Add a brown embroidered ring around the eye.
Keep ring thin and tight.
🪽 Wings (Make 2)
Pale grey with bold navy bands
R1: MR 6 (6)
R2: inc ×6 (12)
R3: (sc, inc) ×6 (18)
R4: (2 sc, inc) ×6 (24)
R5: (3 sc, inc) ×6 (30)
R6: sc around (30)
R7: (4 sc, inc) ×6 (36)
R8–R11: sc around (36)
Stripe Section (Wide Bands)
Switch to navy
R12–R14: sc around (36)
Switch back to pale grey
R15–R18: sc around (36)
FO, flatten softly.
Placement:
-
Attach high on the body
-
Upper wing edge should meet mid-chest height
-
Slight downward tilt toward the tail
This matches the photographed position exactly.
🪶 Tail (Fan Shape, Not Flat Block)
Dark navy
Ch 14
Row 1: sc in 2nd ch, 12 sc (13)
Rows 2–5: ch 1, sc across (13)
Rows 6–7: ch 1, dec at both ends (11)
Rows 8–9: ch 1, sc across (11)
FO.
Lightly block to curve into a soft fan.
Attach tightly at the very bottom of the body, angled slightly down.
🦶 Feet (Make 2)
Dusty pink with brown claws
R1: MR 6 (6)
R2: inc ×6 (12)
R3–R4: sc around (12)
R5: (sc, dec) ×4 (8)
R6–R8: sc around (8)
Create 3 toes each:
-
ch 5
-
sc 4 back
-
sl st to base
Repeat ×3
Add brown stitching at tips.
Angle toes slightly inward.
🧵 Assembly
-
Sew beak centered under eyes
-
Add subtle brown eye-rings
-
Attach wings high, mid-chest alignment, front curve slightly tucked inward
-
Sew tail low and tight at body base, lightly downward
-
Attach feet at front base, toes angled toward each other
-
Add tiny green & pink speckles around the neckline if desired
🎉 Final Touches
Your realistic pigeon is ready! 🕊️💙
With its rounded chest, iridescent neck fade, dusty pink breast, wide navy wing stripes, sculpted tail, and adorable tiny feet, it looks just like the photo.
Perch it on a wooden block, desk, or bookshelf and enjoy its calm, observant presence.
If you want a color-chart map, graph squares for the mottling, printable PDF, or wired toes variation — just say the word!